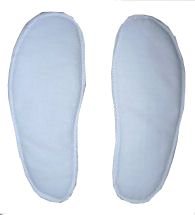
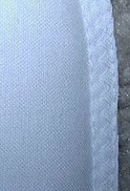
Hiking Boot Insert
Disclosure: This site contains affiliate links. As an Amazon Associate, I earn from qualifying purchases. Clicking on links, and purchasing products, may result in the seller paying us compensation - at no extra cost to you. Affiliate links are in green.
Also see:
Articles and Tips
Easy Sewing Patterns
Clothing Patterns
Crafts and Decor
Have Your Boots Seen Better Days?
We all have an old pair of favorite hiking or work boots. We have already worn them in and they have become a good friend over the years. They just need a bit of new comfort added. Or perhaps cold or heat is a problem. These wonderful insulated soles are the answer. I first made these for a friend who had multiple sclerosis, and he loved them. Over the years friends who hike, hunt or work outdoors have requested them. I get cold feet, so these are a must for me during winter hiking season.
I use Insul-Bright insulation for this project. Anyone who works outdoors in the cold (or suffers from cold feet) can use these. They are thin enough to fit into slippers or roomy boots.
SUPPLIES
Fabric: Four pieces of fabric large enough for your foot pattern. I recommend cotton or cotton flannel.
Batting: Two pieces large enough for your foot pattern.
Insul-Bright Insulation: Two pieces large enough to for your foot pattern.
Stiff interfacing or a strip of flexible plastic **
(about 1" wide and the length of the foot)**
**The interfacing or plastic is used to keep the insert flat. Without it, with continued wear, the insert tends to bunch up in the shoe. Be sure your foot can breathe through the stiffening material you choose (perhaps cut holes in it).
All seams are 1/4".
Other
thread to match background of fabric
large sewing ruler (optional but nice to have)
scissors or rotary cutter with cutting mat
pins
DIRECTIONS
1. Trace your foot onto a piece of paper. Label it as right or left foot or mark an "X" on one side of the pattern. Cut out the pattern.
2. Cut two pieces from the outer fabric, two pieces from the batting, and two pieces from the insulation. Turn the pattern over to the wrong side and cut two more pieces from the outer fabric.
Cut two pieces of interfacing, or two strips of plastic.
3. Stitch a small line on the right side of two opposite pieces of the outer fabric. It is just a line to mark the fabric, so you will know later which is the under side of the insert.
4. For each foot, layer the following: the marked outer fabric on the bottom, right side down, then the stiff interfacing or flexible plastic strip, then the insulation, then the batting, then the outer fabric, right side up. Pin the layers together. Zig-zag stitch around the outer edge, close to the edge (be careful not to stitch through the plastic). Trim.
5. Zig-zag stitch around the outer edge of each side, stitching through all three layers. Straight stitch around the sides, stitching just inside the zig-zag stitch. Trim edges.
Your insulated soles are now finished. The stitch mark on the bottom of each foot's insert shows which side is down for each foot. It doesn't really matter, but this way the batting (with padding) is next to the foot. The insulation is closest to the cold. You could try it either way. For added warmth you can add a second layer of batting, putting a layer on both sides of the insulation.
Enjoy Your Added Comfort!


From winter storm watching to outdoor recreation to social gatherings: our favorite activities for the dark and cozy time of year.