Paint Your Chain Link Fence
REFINISH THE OLD CHAIN LINK FENCE
Turn an old rusty chain link fence into a beautiful fence that you can be proud of.
Disclosure: This site contains affiliate links. As an Amazon Associate, I earn from qualifying purchases. Clicking on links, and purchasing products, may result in the seller paying us compensation - at no extra cost to you. Affiliate links are in green.
finished fence before privacy slats installed
An improvement was desperately needed!
I loved our new “Northwest Cottage” from the moment I laid eyes on it. It was much smaller than our huge Phoenix home, and needed a LOT of work, but it was close to all the places we loved to explore - mountains, rainforest, ocean.
However, one of the first things I noticed was the old, rusty chain link fence. It screamed out “Help!”
Because so much needed to be done INSIDE the house, the fence didn’t even make it onto our “to do list” for quite some time. I knew that the day we tackled the fence would be a happy one, because it would mean that the house was basically done. Yay! I kept that in mind as we sanded and painted. Painting a chain link fence is TIME CONSUMING, and definitely not fun - but it is VERY REWARDING. We met a lot of neighbors as we painted - they would stop to comment and ask what products we were using. Many said that they needed to do the same with their fences.
So - here is our post on how to do it. We watched various videos and read a lot of articles, but none seemed to have ALL OF THE INFORMATION needed. Our post lists all supplies we found to be essential, and all tips we learned along the way.
You cannot skip steps if you want your fence to turn out nicely.
BEFORE
The following photo shows the fence before painting. It was rusty, and the old finish was in need of help. Definitely an eye sore. Our fence runs along the road on one side of the house, and is quite long. It is not a back yard fence that is hidden from view. Everyone coming and going from our neighborhood drives right by this old fence. With the house basically done, it was time to tackle this job.
chain link fence before painting
“New” Fence
We thought about replacing the chain link fence with a wood fence, but after having to replace fence posts of a wood fence in another part of the yard we gave up on that idea. A wood fence requires constant upkeep, and I didn’t want a fence that would need to be replaced down the road. We live “out in the country” where most homes have chain link. Plus we liked that the chain link was not full height - we wave to neighbors as they walk by. I didn’t want to be shut in by a tall fence.
We drove around and noticed that nicer homes had new metal fences (or they looked new), with beautiful gates, so we decided to dress up our old fence. All that was needed was some cleaning up and painting - right? Well, it turned out to be a larger job than anticipated, but what a reward! From total eye sore to very nice looking. It took LOTS of labor, but was very cost effective. Two large cans of primer, and two large cans of exterior oil base paint did the job, along with a spray can each of primer and top coat for the tiny nooks and crannies.
Update: one year after we painted the fence, we added black privacy slats. We purchased them from Amazon. 😊
SUPPLIES
Click links to check Amazon prices, and help support our site.
cardboard, tarp, or painter's drop cloth to place under the fence.
paint brushes we went through several – I would recommend at least two brushes for each coat of paint. I used 2.5” trim brushes from Ace Hardware.
Shovel - to dig out under the fence as needed
Pressure Washer you can also use a yard hose, but the pressure washer does a better job – use a brush as needed as well
Sand Paper to sand off rust as needed
Galvanized Steel Primer Paint - MUST be manufactured for covering galvanized steel
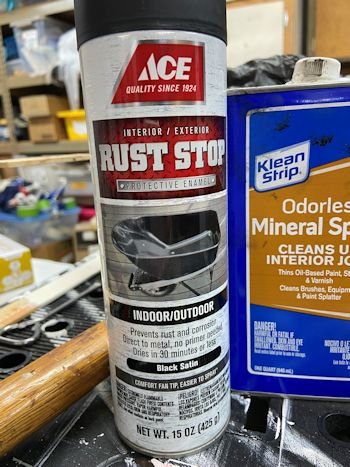
exterior paint for metal – we used Rust Stop oil based enamel by Ace, Black Satin
Hedge Trimmer - optional – for cutting close shrubs back from the fence
Resealable Plastic Bags (such as zip-lock) for storing brushes when not in use
Disposable Gloves definitely recommended when using the oil base exterior paint
mineral spirits for cleanup
cloth for skin clea-up I used Disposable Cosmetic Pads
Rubber Mallet or hammer (for pounding down the paint can top when done painting)
Privacy Slats optional
Prepare Fence & Surroundings
1. Pressure Wash The Fence
All debris must be removed from the fence. Use a hose or pressure washer to remove all loose paint, dirt, and other debris.
2. Cut Back Shrubs
As you can see in the following photo, I had to cut a shrub back from the fence. The branches actually extending through the chain link. I cut it back far enough to allow space for me to walk between the shrub and the fence. I am a small woman, and I used a small, cordless hedge trimmer by Worx. This photo was taken after I had started the undercoat.
3. Remove Rust
When rust peels, it takes paint with it, so rust must be removed. Use sand paper where necessary to remove loose rusty areas. We still had the color of rust in areas, but loose, flaky rust was removed.
4. Prepare The Area Under The Fence
The prior owners of our house created a grass-free area under the fence - for most of the fence. We kept that “ditch” edged as they had done. There was space between the fence and the dirt underneath, which helped tremendously. If grass had begun to grow, we dug it out.
In places where the fence was over grass, we trimmed the grass. We then placed a tarp or large piece of cardboard under the fence to catch paint drips and splatters.
Paint Undercoat
Stir, stir, stir the paint! The first can we used had been purchased a while back, and we needed to use a stir stick on it. It required quite a bit of stirring. After that, we used paint cans immediately after purchase - the store shook them for us. Much better! The following photo shows me just starting to stir the paint.
I found it easiest to start with the brush. I used the brush to get the top points (the links that extend above the upper bar), the top and lower bars, and all cross pieces in the gates. My husband used the brush for the lowest links - close to the ground.
I used the roller to run over the face of the fence. I chose a fairly fuzzy roller, so I could get it down into the fence’s links. The coverage was good. It did leave areas that the roller could not fit into; that’s where spray paint comes in handy (if the brush also could not reach).
Start with a brush or roller. Experiment to see what works for you. Our undercoat paint was white, which was a great choice because I could easily see what had been painted, and what remained to be painted.
As my husband and I worked, neighbors began to stop by to ask about the project. Even with just the white undercoat, the fence looked so much nicer! That was incentive to keep going.
After a lot of trial and error, I learned that it went faster to roll on the diagonal across the links that came up toward me, then go back and push my roller into the indented links. The roller fibers actually reached around each wire a bit, so the second side was completed much more quickly than the first.
My husband came along behind me and sprayed on primer in areas I had missed. He also was a saint, in that he placed cardboard under the fence, then lay on his side and painted the lower areas that were along the ground. I could NOT keep bending down and standing up.
Notice that the primer spray paint was not white. That didn’t matter - it would be covered by black. The important thing was to get the entire fence well coated.
My husband and I split up this nasty job into tasks and each did our part. It took us about a week to complete - not bad. It was during a hot part of summer. We had to time the painting so we would not be out in the heat of the day. We also had to dodge a few rainy days. We finished the job a couple weeks ago, and now rainy season is just starting. Perfect timing!
The primer was acrylic (water clean-up), but the final coat (black) was oil based enamel paint. It was thick, and I sometimes felt that I was painting with tar. It could become thick and sticky. I went through two brushes. Gloves were a must. Paint splatter got onto my clothes, and onto areas of my arms that were exposed. I found that cosmetic pads worked really well for cleaning off spots from my face and arms. I applied a bit of mineral spirits to the pad, then wiped off the paint. After the paint was removed I washed and rinsed the area of skin that was cleaned. If you have allergies or sensitivities, keep yourself covered so you do not have to apply mineral spirits.
Beautiful!
Add Privacy Slats
Optional: add privacy slats. We decided to add the slats to “finish off” the fence. They provide privacy, plus I think they really added to the overall look. It is a beautiful fence that will last well into the future now.
We purchased our Privacy Slats on Amazon. They were very easy to install, though they needed trimming in a few areas. They were made of plastic material, so trimming was quite easy.
The photo shows the slats partially completed.
Reward Yourself
Remember - a proper work / play balance is important. See our Lifestyle Blog for articles on hiking, biking, inspiration, and more.
After finishing the fence, we treated ourselves to a trip to the Olympic Peninsula, Port Townsend, and Fort Warden State Park. While in Port Townsend, we visited a bike shop and fell in love with some bikes.
See my post on how to buy your perfect e-bike.
Another fun job
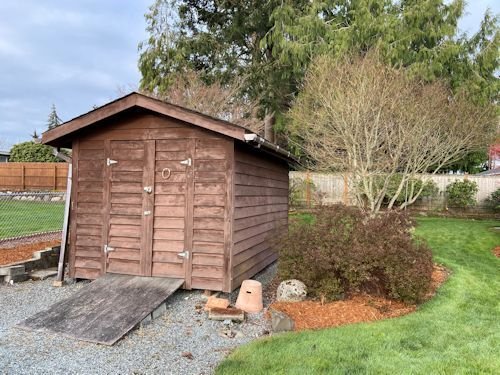
Now that you have fixed up that fence, you might want to work on that old shed. Below are before and after photos. Phase 1 was to repair and paint. Phase 2 was to add a new deck top shed ramp.
Exterior Home Improvement
Exterior Decor Projects
Lifestyle Blog
It’s all about enjoying life.


Protect your wood deck from the elements with proper prep and quality stain. Proper maintenance enhances the life span of a wood deck. Protect from snow, rain, freezing ice, hot sun.