Bridal Floral Sash
My good friend was getting married, and wished to add a sash to her beautiful wedding dress.
The sashes we saw for sale were not quite what she wanted. I decided to create the perfect sash for her - as a gift! She sent photos to me of the types of sashes she liked, as well as a color scheme. Another friend made a matching bouquet.
Disclosure: This site contains affiliate links. As an Amazon Associate, I earn from qualifying purchases. Clicking on links, and purchasing products, may result in the seller paying us compensation - at no extra cost to you. Affiliate links are in green.
Also see:
Follow Our Adventures
Accessory Sewing Patterns
Holiday
Floral Projects
Save Money On Your Wedding With DIY
By making items yourself you save money and get just what you want - custom made!
Size Of Bridal Sash
The size is determined by measuring the waist and adding enough for a tie and tails. My friend wanted the sash to tie into a bow in the back, and then have the tie "tails" extend to about 12" or so. We tied a ribbon around her waist, tied it into a bow, and let the tails fall to about the length she wanted. We then measured the length of that ribbon and it gave us a starting point.
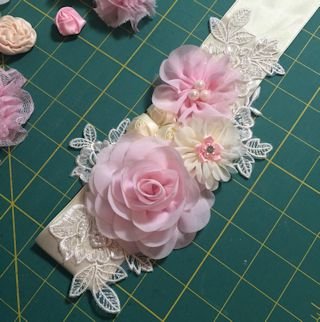
To know how much area would be covered with decoration, we tied the sash around her, and measured the area on the front that she wanted to decoration to cover. The following photo shows the final sash, with decoration in place.
Once I knew the area that would be covered by the decoration, I could plan what to include in the floral decoration.
SUPPLIES
satin rosebuds:- several cream colored silk rosebuds (or colors of your choice)
floral lace pieces: - several pieces of white lace flowers for the base (the lace I used contained tiny "pearls")
larger flowers: - pink silk flowers of varying size (one large and one smaller)
satin ribbon: - 2" width, in the length you need (choose the width you prefer)
fabric glue: - permanent adhesive appropriate for fabric (must dry clear)
scissors: sharp scissors for precision cutting
large cutting mat: the mat is optional; however it was a huge help to me for determining just where to lay my pieces. A large ruler could also be used.
DIRECTIONS
See the photos below - click on photo for larger view.
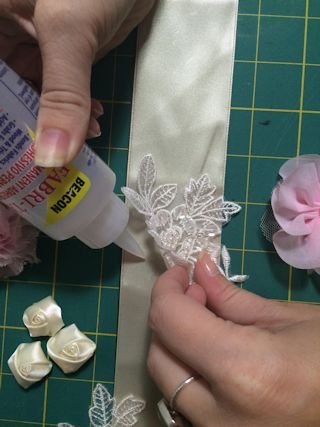
1. Plan Your Design / Glue Base Layer
Try out various designs. Make sure to keep the design within the planned boundaries (the area you have decided the decoration will be on the sash). Do NOT glue anything down until you are sure of placement. When I was happy with my layout, I took a photograph to be sure I would not forget my plan. Referring to my photo, I then started gluing down pieces, starting with the base layer of white lace flowers.
2. Glue The Next Layer
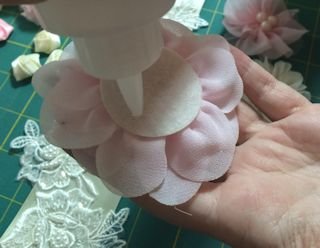
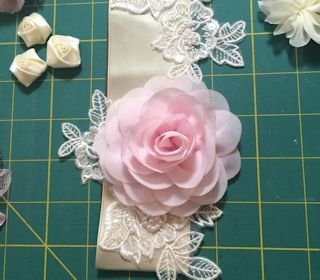
My pink flowers had a nice felt backing, which provided a flat surface to apply glue onto. I applied the glue, then carefully placed the flowers onto the sash, covering part of the lace flowers in the base layer.
When the pink flower was in place, just the outer leaves of the lace flowers of the base layer showed.
NOTE: I folded my sash so that the part I was working on came just to the fold line. Visually, it was easier for me to work this way.
Continue gluing pieces until all pieces are on the sash. I was very happy with the end result!
Precious Memories
I was so happy to be able to create something special and meaningful.


Rustic wood bar made from wood pallets. Quick and easy.