Printable Mini Boxes
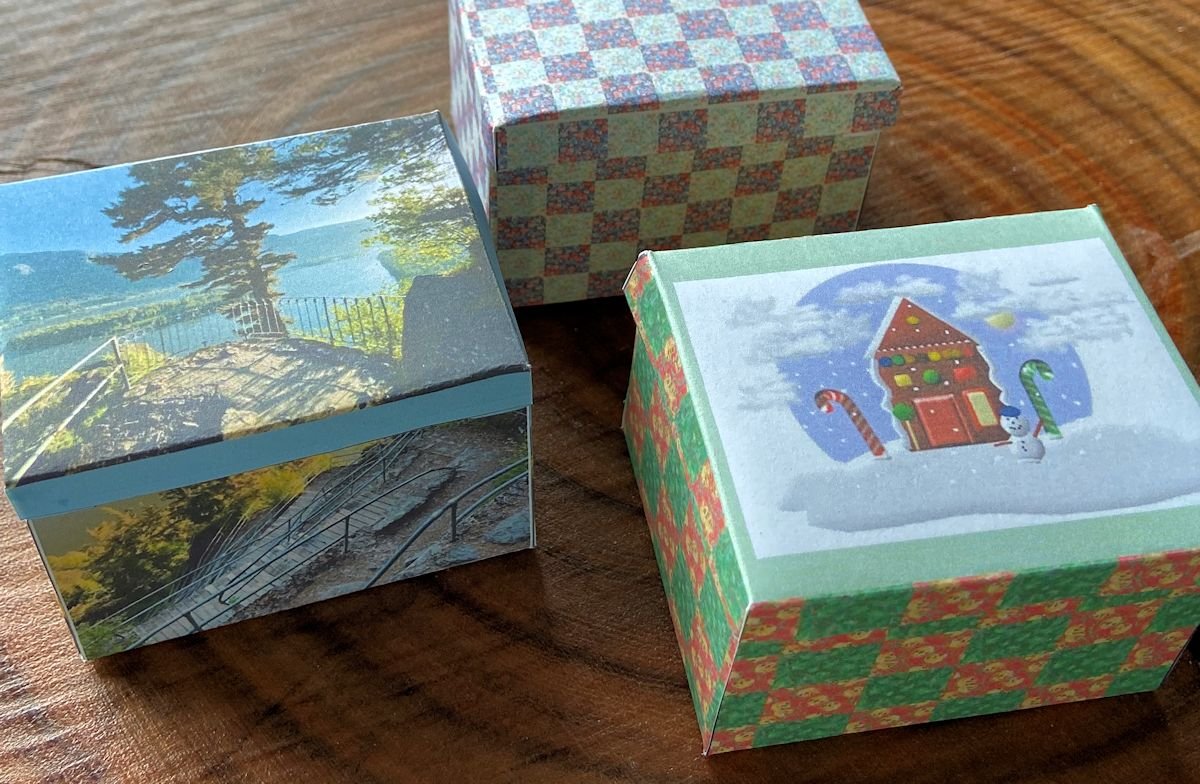
Four templates provided: Christmas, quilt, Beacon Rock, and a blank. Use the blank to create your own designs.
Previously on CraftAndFabricLinks
same owners - new site
Disclosure: This site contains affiliate links. As an Amazon Associate, I earn from qualifying purchases. Clicking on links, and purchasing products, may result in the seller paying us compensation - at no extra cost to you. Affiliate links are in green.
Also see:
Free Sewing Lessons
Holiday Projects
Art Projects
Home Improvement
Turn 2-dimensional into 3 dimensional
This project is a fun, creative way to teach kids about 2 dimension vs 3 dimension. Help them learn to visualize. What does a 2-d box look like when folded up?
Math Dimensions
Also, learn the dimensions of a cube type shape. For example, if the top measures 3” wide by 2” deep, each side must also be 2” deep, and the front and back must be 3” wide. If the box is to be 3” high, front, back and sides must all be 3” high. Kids can change measurements, but all sides, top and bottom must fit. It’s like a 3-d puzzle.
Image Orientation
In thinking 3-d, your child will learn proper orientation of images. For example, all images used for front, back, and sides must have the bottom of the image toward the bottom of the box. That way, images will be right side up on each side. You can easily see that by printing out the Beacon Rock box.
Templates Provided
Christmas Mini Box
Use our free template to print an adorable Christmas mini box. I improved the graphics from our older version. This was previously on CraftAndFabricLinks, and has been updated to a crisper image.
Quilt Mini Box
Adorable little quilt with checkerboard quilt graphic, created from actual scans of fabrics I had. This was also previously on CraftAndFabricLinks.
Beacon Rock
I also tossed in my Beacon Rock box. In updating this project (while moving it from our previous website), I realized I needed new photos and instructions. I decided to create a memory box from my recent, beautiful Beacon Rock hike. Beacon Rock is located on the Columbia Gorge, in Washington.
You can do the same, with your own photos! I include dimensions for inserting photos into my plain box template, along with the jpg version of the plain box. Use your own graphics program to insert photos.
4 of the 5 photos are shown below.
Plain Box
Print the plain box and decorate as you wish. Your child can paint, color, draw, stamp. Collect nature items and place in the box, or glue to the outside.
SUPPLIES
card stock
glue stick
Custom box (optional) supplies: paint, paintbrush, crayons, stamps, items to glue onto box
Print one of the following templates (use white card stock)
Choose Your Template
DIRECTIONS
Free Video Tutorial
IMPORTANT: I created a video for this project. It is at the end of the article.
1. Print the template of your choice.
2. Cut Out Template
Using scissors (with adult supervision), cut out the box. Cut the two short lines that the arrows point to. That cut is needed for the lid lip - so that it can fold down over the box.
3. Fold
Fold each section, and fold under the tabs.
4. Glue
Place the template face UP on a flat surface. Place glue on the tabs located on each side of a side section. Place glue on the tab that is on each side of the front lip on top. Glue the sides to the tabs where applicable.
The following photo shows the box base folded and glued, and the top lip folded, with tabs cut and ready to be folded and glued. The front lip is folded under. The sides will be folded under, and the tab will go behind the front lip (glue just on the portion that is sticking up in the photo - a small square area).
Watch the video at the end of this post to see the process.
Custom Photo Box
Print the following template if you wish to create your own photo box. It gives dimensions of each section, plus shows the direction photos must be placed.
BE SURE YOUR PHOTOS ARE 200 dpi RESOLUTION. 200 is a good print quality. You will need to crop photos to the sizes listed on the template.
You will also need the plain box jpg to add your photos to. I used PaintShopPro as my graphics program. The bottom layer was the template. I then created a new layer, placing the photos into place per the box template. I then merged the layers and saved my template, now having the photos.
Please Share
We rely on advertising to keep our site free. Please share with friends.


Valentine abstract watercolor for small painting or card. Create stunning designs. Instructions plus printable heart templates.