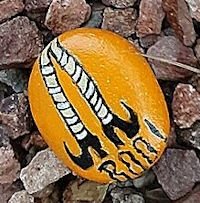
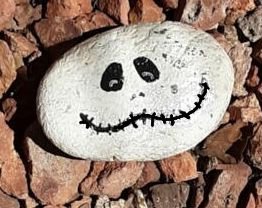
Painted Halloween Rocks
Disclosure: This site contains affiliate links. As an Amazon Associate, I earn from qualifying purchases. Clicking on links, and purchasing products, may result in the seller paying us compensation - at no extra cost to you. Affiliate links are in green.
Also see:
Follow Our Adventures
Home Improvement
Art & Painting
Halloween Sewing & Crafts
SUPPLIES
Rocks
Choose rocks that can be painted in the shapes you need - such as ghosts - or round or square for Halloween scenes. I found these rocks in my yard and near my house. I chose a variety of shapes. Smooth, round rocks work for a variety of painting scenes; choose the shape that best fits your design.
Wash the rocks, using a brush. Make sure all debris has been removed. Let dry.
Other Supplies
brushes in various sizes (I use a variety of flat brushes, plus an outliner, which is a fine tip brush)
paper towel
acrylic paints: FolkArt, Americano, other brands of craft paints or artist quality paints such as Liquitex, Amsterdam or Grumbacher. Any of these work well.
OR, instead of paint, use: Waterproof Paint Pens
cup of water
dotting tool for making small circles for eyes (or use your finer brush)
Rustoleum 2X Gloss Clear - to provide protective coating
paper plate with a polished surface (foam type plates) to hold and mix paint (a fancy artist’s palette is not necessary)
INSTRUCTIONS
Lay Out All Your Supplies
I set up everything on my outdoor patio table. What a lovely place to paint! I live on a lake in the Phoenix area, and enjoy cool mornings and evenings of summer - or any time in winter. With the lake breeze, I can relax and paint.
Apply First Coat
Put down a good base coat. You can use white as a base coat if you wish. That might help if you are painting a light color over a dark rock.
NOTE: For my ghost rock, I painted the white ghost first, then painted the black background.
Add More Coats Of Paint
It’s fine to use colors just as they are, or you can get fancy and mix the colors. Pour a color or two of paint onto the plate, then mix them with your brush or a palette knife (or popsicle stick or anything else you have handy).
Each coat does not have to cover the entire rock. You can add color tones here and there for interesting effect.
Add Details
With a finer brush, paint on faces and other detail.
Apply Protective Coating
Apply a coat of Rustoleum 2X Gloss Clear. My rocks have withstood desert heat and sun for a few years now, with no fading.


Valentine abstract watercolor for small painting or card. Create stunning designs. Instructions plus printable heart templates.