Cat Window Platform
Perfect solution for your window-gazing cat or small dog
Custom build to any size. Super easy project.
Cat Stairs made by my father
Rooster Rudy
Our cat was a true gem. All cats are, but our Rooster Rudy went beyond anything I had experienced with a cat. My mother-in-law rescued him while she still lived on her own; in return, he became her life companion. When she started to require assistance, and moved in with us, he became her caregiver. He followed her everywhere. Ever vigilant and always on duty. He alerted us if she fell, or got up in the night. He sat with her while she had her meals. He was always by her side. If she tried to sleep in, he pawed her face until she awoke, then “herded” her to the kitchen for breakfast. Truly unique, we all loved him. People used to tell me to set up an instagram page for him.
We called him Rooster Rudy because he believed it was his job to get everyone up by 6 each morning. That was not always appreciated, but he was such a gem we tolerated the behavior. He was a very large, beautiful cat, and truly one of a kind.
Rudy was a “senior cat”, and when his health began to slip, my hope was that he would just go quietly in his sleep. That was exactly what happened - just before Christmas this year (2022).
He took care of all of us (especially my mother-in-law), and we cared for him in his older age.
Part of caring for a pet is making sure they are comfortable and happy. They are family members. Cat Stairs provided assistance to him when he could no longer jump up onto the couch, or onto his favorite window perch. They were made by my father.
Like all cats, our Rudy loved to look out the window. Partly due to sun (they know where to find warm spots in the house) and partly due to the need to see what is going on outside the window. Rudy loved to “chatter” to the birds and other wildlife that came into his sight.
Portrait By Judy Roberts
Everyone loved “Rooster Rudy.” A good friend and artist created a portrait of my mother-in-law and Rudy sitting in front of the window. This was shortly after we moved in.
We only had a couple folding chairs at the time, but they both enjoyed sitting together by the window.
She captured them beautifully.
Can’t Quite See Out
Rudy loved to lie on an old cedar chest that I inherited from my grandmother, but it was a bit low for him to see out the window when he was lying down. He had to get up to see out. I mentioned it to my husband, who immediately came up with the perfect solution - a window platform that would sit on the cedar chest.
SUPPLIES
SAFETY NOTICE
REMEMBER TO FOLLOW ALL DIRECTIONS AND SAFETY PRECAUTIONS listed on product labels. Work in a well ventilated area when painting and sanding. Use a dust mask and eye protection for all cleaning and sanding. Use gloves when using cleaners such as TSP. We did not use that for this project, but I often use it to clean wood before painting.
saw - if needed for cutting wood pieces
measuring tape
wood glue (or nails and hammer if you prefer to nail the unit together)
interior latex paint (or paint of your choice)
paint brush, sand paper
wood pieces: rectangle top, two end pieces, a front piece, and a center support piece (refer to photos below)
INSTRUCTIONS
1. Compute Size Of Platform
We cut the top piece as a rectangle that was the exact same size as the rug Rudy loved to sleep on. That is the benefit of custom building an item. We used pieces of scrap wood we had from other projects.
You just need the top piece to be large enough that your cat or small dog can comfortably lie on it.
Once you have the top piece cut, measure the sides that you want to support pieces to connect to. I will call this the base.
Our base was made from 3 short pieces - one for each short end of the top, and one (shortest piece) down the center for extra support, plus a piece that ran across the front of the platform. The back side (against the window) was left open. When looking straight on at the platform, the front and sides were covered. Refer to the photos below.
If you wish for all sides to be closed, you will need 4 sides for your base.
2. Cut and Attach Top Piece And Two End Pieces
Cut the top piece and 2 end pieces. Our scrap pieces for the base were already painted white.
Lay out the pieces to be sure they will be the right fit. The following photo shows the top piece, right side down, and the 2 end pieces.
Run a line of glue (see previous photo) along the underside of the top piece, on each end - where the end pieces will be placed.
End Pieces In Place
Place the end pieces on the lines of glue. Allow to dry before proceeding.
3. Cut & Place The Front Piece
Measure between the two end pieces; cut the front piece and slip it between the 2 end pieces. Glue into place. You don’t need high tech equipment. My husband used the weight of two paint cans to hold the unit together while the pieces dried.
4. Cut & Glue Center Support Piece
Measure from the front piece to the back (open side) of the platform. Cut a piece of wood and glue it into place as shown in the following photo.
5. Sand & Paint
Use caulk or wood patch as necessary to fill where needed. Sand any rough areas.
Use a tack cloth to remove any dust caused from sanding.
Paint on a coat of primer. When dry, apply a coat of paint. Apply a second coat of paint if necessary. Let thoroughly dry between coats.
Happy Cat!
Rudy got a lot of use out of his “window platform” over the years. He was on it when not in his favorite box. We wanted to pass this project onto all of you cat lovers!
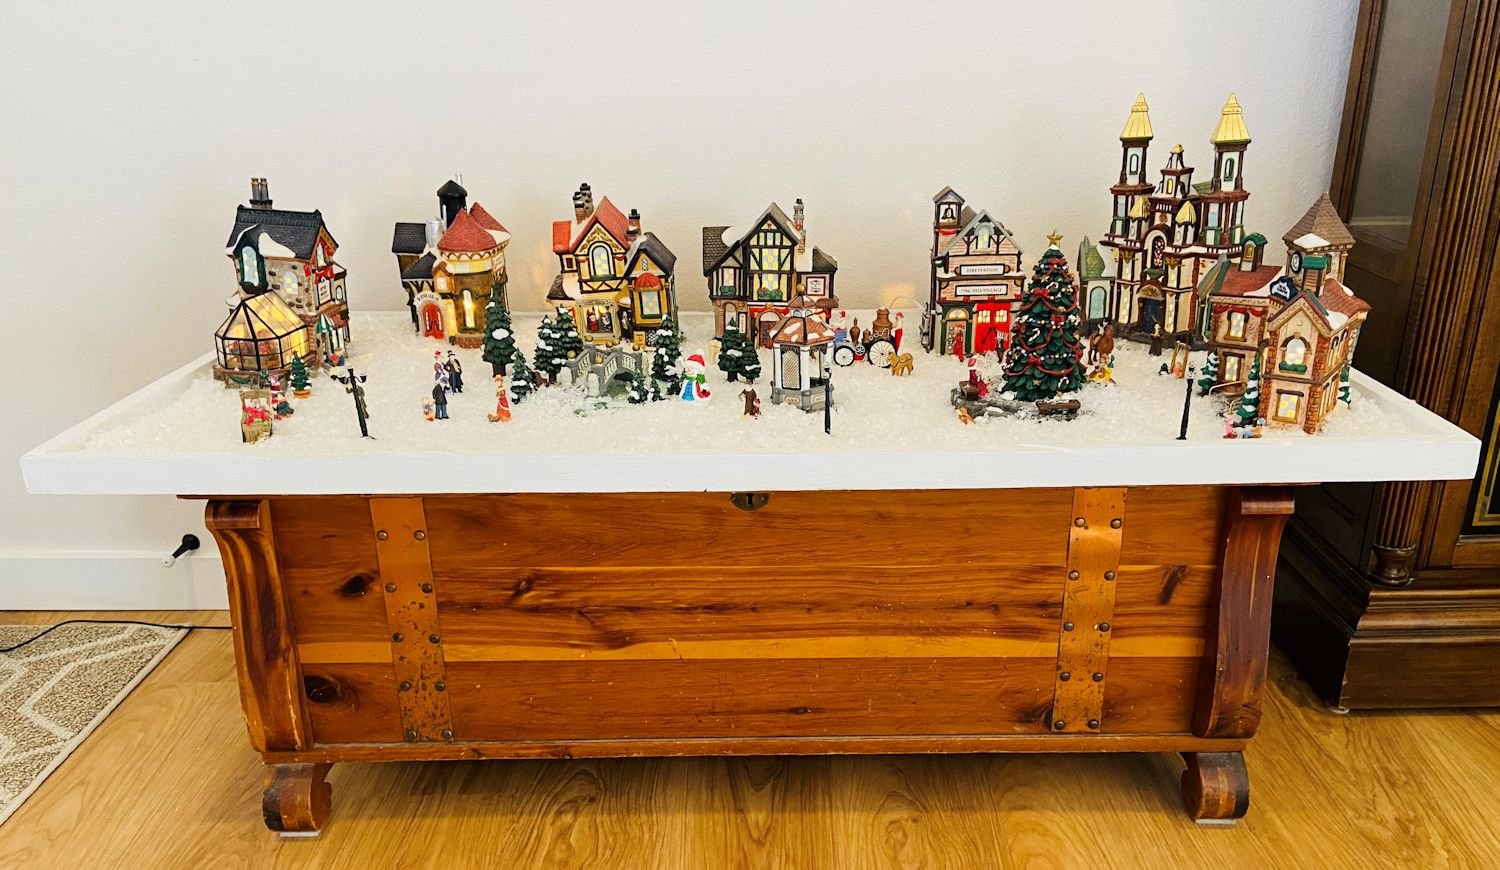
My cedar chest also doubles as a place to hold our Christmas village. Our instructions work for any flat surface.
Pet Sewing Patterns
Notes From The Workroom & Trails


Adorable, super easy stuffed cat ornament. Embroider or paint a face. Add a ribbon bow.