DIY Pre-quilted Fabric
This lesson comes from our former site, CraftAndFabricLinks. Same owners - new site.
Also see:
Articles & Tips
Easy Sewing Patterns
Sewing Lessons
Home Improvement Projects
DIY Pre-quilted Fabric: double sided quilted fabric
Use for tote bags, hot pads, placemats & other items.
Pre-quilted fabric is made up of two layers of fabric, plus a bit of padding in between. It can be a bit expensive - when you can find it. Both sides are the “right side”, so it can be used to create totes, appliance covers, placemats, and many other items. All you have to do is finish the cut edges.
Can’t find pre-quilted - OR you would rather make your own? It’s quite easy, with the right tools.
NOTE: I took this lesson from my previous site: CraftAndFabricLinks.com. We are moving content from that site to this one.
Edge Guide / Quilting Bar
A quilting bar (also called edge guide) greatly assists in this project. If you don't have one, don't panic. Although an edge guide means less work, pre-quilted fabric can be made without one.
SUPPLIES - for one 8.5” square (adjust size as needed)
A quilting bar (also called edge guide) greatly assists in this project. If you don't have one, don't panic. Although an edge guide means less work, pre-quilted fabric can be made without one.
Top Fabric: A piece of fabric in the size you need (or one full yard if you wish to make one yard of double sided prequilted fabric)
Opposite Side Fabric: A piece of fabric in the size you need (or one full yard if you wish to make one yard of double sided prequilted fabric)
Batting: Same size as fabric pieces
Quilting Bar: (sometimes called edge guide). Refer to the ad below. The quilting bar assists you when stitching so your your rows remain straight and evenly spaced.
Other
thread to match your fabric, or embroidery thread for a decorative touch, or contrast thread
large sewing ruler (optional but nice to have)
scissors or rotary cutter
pins
fabric marker or pencil (optional but nice to have)
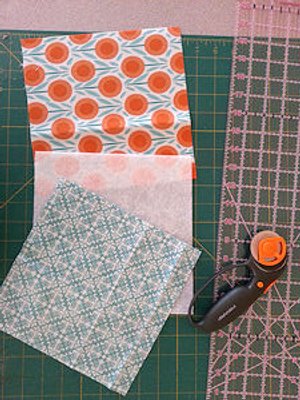
supplies
Pre-wash, Dry, & Press Fabric
If you plan to wash your prequilted fabric in the future, pre-shrink the fabric before using. Cotton fabrics (such as quilt fabric) shrink; pre-wash, dry and press before using.
DIRECTIONS
Set Up Your Sewing Machine
Attach your quilting bar to your needle arm, following instructions for your machine.
Alternative if you do not have a quilting bar:
If you do not have a quilting bar, you can still do this project. You will need to measure and draw lines an equal distance from one another. A quilting bar takes away this time-consuming step.
Mark Fabric - Square Fabric
Layer your fabric pieces as follows: Bottom layer wrong side up, batting layer, then top layer right side up on top. Pin the layers together (or use basting glue). OR stitch around the perimeter of the fabric, 1/8" from the edge (this works for small pieces of fabric).
Using a washable, non-permanent fabric marker, draw a line from corner to corner on one side of your project. Draw another line between opposite corners.
NOTE: If your fabric is not square, see "Non Square Fabric" after these directions.
Stitch Corner To Corner
Stitch a line diagonally from corner to corner, following one of the lines you drew. Stitch a second line, diagonally, between the opposite set of corners.
The stitching lines have been enhanced in red.
Stitch Remaining Lines
Then, position your needle so that the quilting bar runs over first stitched line. Stitch the second line. Use the quilting bar as a guide for sewing each new line. I usually run a few lines one way, then a few the opposite way. For a small piece, it is OK to stitch all lines one way, then stitch all the opposite lines.

stitch to create pre-quilted fabric
In the next photo, the first set of lines have been stitched (parallel to the line that runs from upper left corner to the lower right corner).
Continue stitching until you have filled the space with stitched lines (both sets of lines).
If you don't have an edge guide, measure and draw lines parallel to one diagonal line; repeat with the other diagonal line. Stitch over drawn lines.
Line Spacing (added note thanks to a visitor’s question)
I space my lines 1” apart. However, you can space more or less, depending on the project. You might like the appearance of larger spacing on a larger project, for example.

DIY pre-quilted fabric
I have created tote bags, glasses cases, placemats and several other items using this method of DIY pre-quilted fabric.
NON-SQUARE FABRIC
What if the fabric you need to pre-quilt is not square? It might be 45" x 30" for example. If your fabric is not square, you have two options.
Method 1: Square off a section of fabric (if your fabric is 45" x 30", you would mark off the segment that is 30" x 30"). Draw a line from each set of corners as explained above, but only within the marked off area (see image on left below). Your 2 sets of lines would be perpendicular to one another. As you are sewing, extend the lines beyond the marked off area. See the figures on the left below.
Method 2: Draw your lines from corner to corner. Stitch lines parellel to these lines. Your 2 sets of lines will not be perpendicular to one another. Your lines will form diamond shapes. See the figure on the right below.
Use your new pre-quilted fabric with our glasses case pattern. I LOVE this pattern. Quick, easy, adorable. Padded case.
Quilt & Kitchen Projects
Rustic table round. Quick and easy crochet using bulky yarn. Add rows to create placemat; omit rows to create coasters.
Woven design crochet table trivet. Printable pattern grid. Intarsia crochet. Sized for table trivet; enlarge as needed.
Swedish Dala Horse with surface crochet embellishment. Printable pattern and instructions. Intarsia and Tapestry crochet. Sized for table trivet. Also use in a blanket.
Learn Intarsia and Tapestry crochet. Bring Hygge into your home with this cozy, Scandinavian minimalist Christmas tree design. For blankets, pillows, hot pads.
Sized for a kitchen wash cloth or scrubby. Durable, cotton, basket weave crochet.
Adorable doll quilt or quilt block. Prairie girl enjoying her garden along with her dog.
Bone quilt block. Use for your own quilt design, or with our Puppy And Cat Pals quilt.
Learn the Ohio Star quilt block while making this Independence Day placemat with watermelon applique. Included: instructions for solid center block.
Three different Halloween scenes to applique. Use for pillows, hot pad, quilt blocks, wall hanging. So many uses!
Two patterns! Country Girl and Dinosaur applique. For tote, pillow, quilt block, wall hanging. Adorable for baby’s room.
Learn to crazy quilt! Hot pad, quilt block, or decorative pillow block. Fun way to use fabric scraps.
Learn seminole piecing while making this beautiful case. Includes inside pocket for holding glasses.
Saucepan fudge brownie mix gift set. Gift Bag sewing pattern, recipe, and printable label. Valentine gift - or any special day.
Adorable 4-inch mini quilt patterns for use as coasters or doll bed. Ohio Star and center diamond.
Valentine’s Day or Independence day. Heart or full flag applique with directions for hot pad and shirt applique.
Looks complicated, but it is actually quite easy with strip quilting technique. Requires sewing points. Pillow, quilt block, or wall hanging for Valentine’s Day.
Applique lesson and pattern. Learn how to use fusible web. Create a spring wall hanging.
2 patterns! Pieced hot pad, and appliqued trivet. Use for quilt, hot pad, trivet, pillows.
Thoughts From The Workroom
Our traditional Fattigman Day tradition. Swedish cookie making instructions with printable recipe.
From winter storm watching to outdoor recreation to social gatherings: our favorite activities for the dark and cozy time of year.
There is nothing like hearty butternut squash soup to add warmth to a cold, blustery day. Learn our secrets for creating an easy, flavorful soup.
Nature provides equal access to the magnificence of wild places. Joy and entertainment are not purchased; they are experienced.
Hygge: emotional wellbeing, content, cozy. Our favorite projects for creating hygge in your home.
How to choose the right e-bike. Biking in the fall is magical. Perfect temps and gorgeous color. Comfort and safety are key to enjoyment, however.
Animals teach us a lot about transitioning from summer to winter. Completing projects in autumn saves us time in spring.
Christmas eve is coming! Need some great homemade gift ideas that you can fit into your busy schedule? Look no further!
DIY Wedding. From plans to putting together your dream team to making it all come together. My full wedding guide and links to my projects.
I hiked Beacon Rock after developing plantar fasciitis - with no problems. PT and the right shoes made it happen. Tips & tricks to help you stay on the trails.
Keep a life balance of social connection even at a long distance by establishing a virtual book club. Follow our posts.
The 2023 summer hiking season is fast approaching. Time to get in shape! Tips for the trail.
Our best articles and sewing projects to inspire and assist on your journey to downsize, organize, and make the best use of your space.
Our ten most popular super simple sewing projects. Each is designed to teach a new skill.
Exchange the endless tidying up of your home for hiking, sewing, crafting - or following your own true passions.
This year, we decided to obtain a permit to get a tree from the mountains. What was to be a relaxing day in nature turned out to be quite the adventure!
The Big Dark in the Pacific Northwest is a peaceful, reflective time that runs from October through spring. Weather is mild, foggy, dark, and rainy - nourishing. We move our focus to indoor projects during this cozy time of year.
October additions to Spruce and Fjell, including a new, custom sideboard exterior table with full instructions, plus beautiful fall bouquet.
Oh fun - moving our old website (CraftAndFabricLinks) to our new site. Tons of work - but it will be worth all the effort.


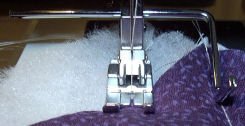
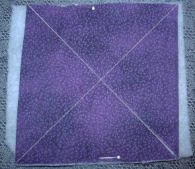
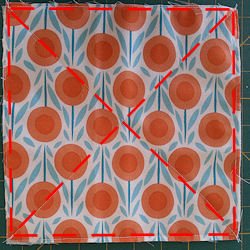
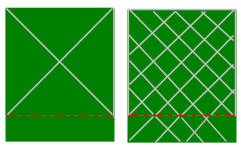
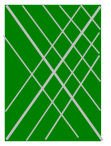
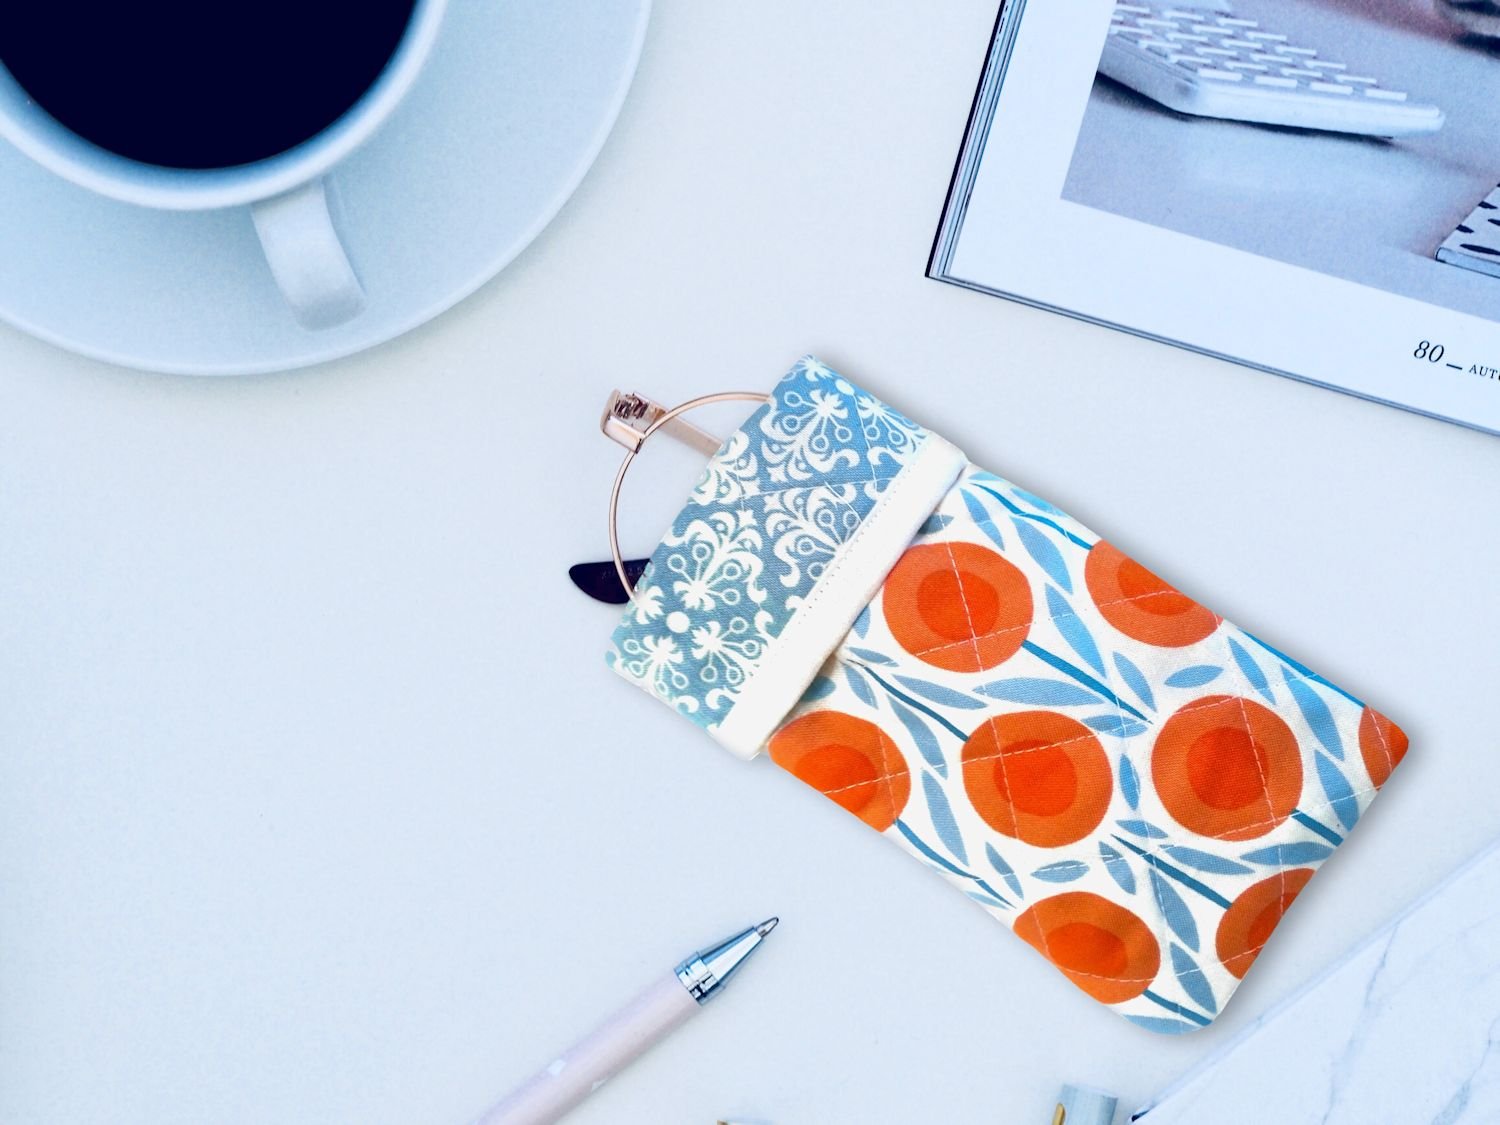




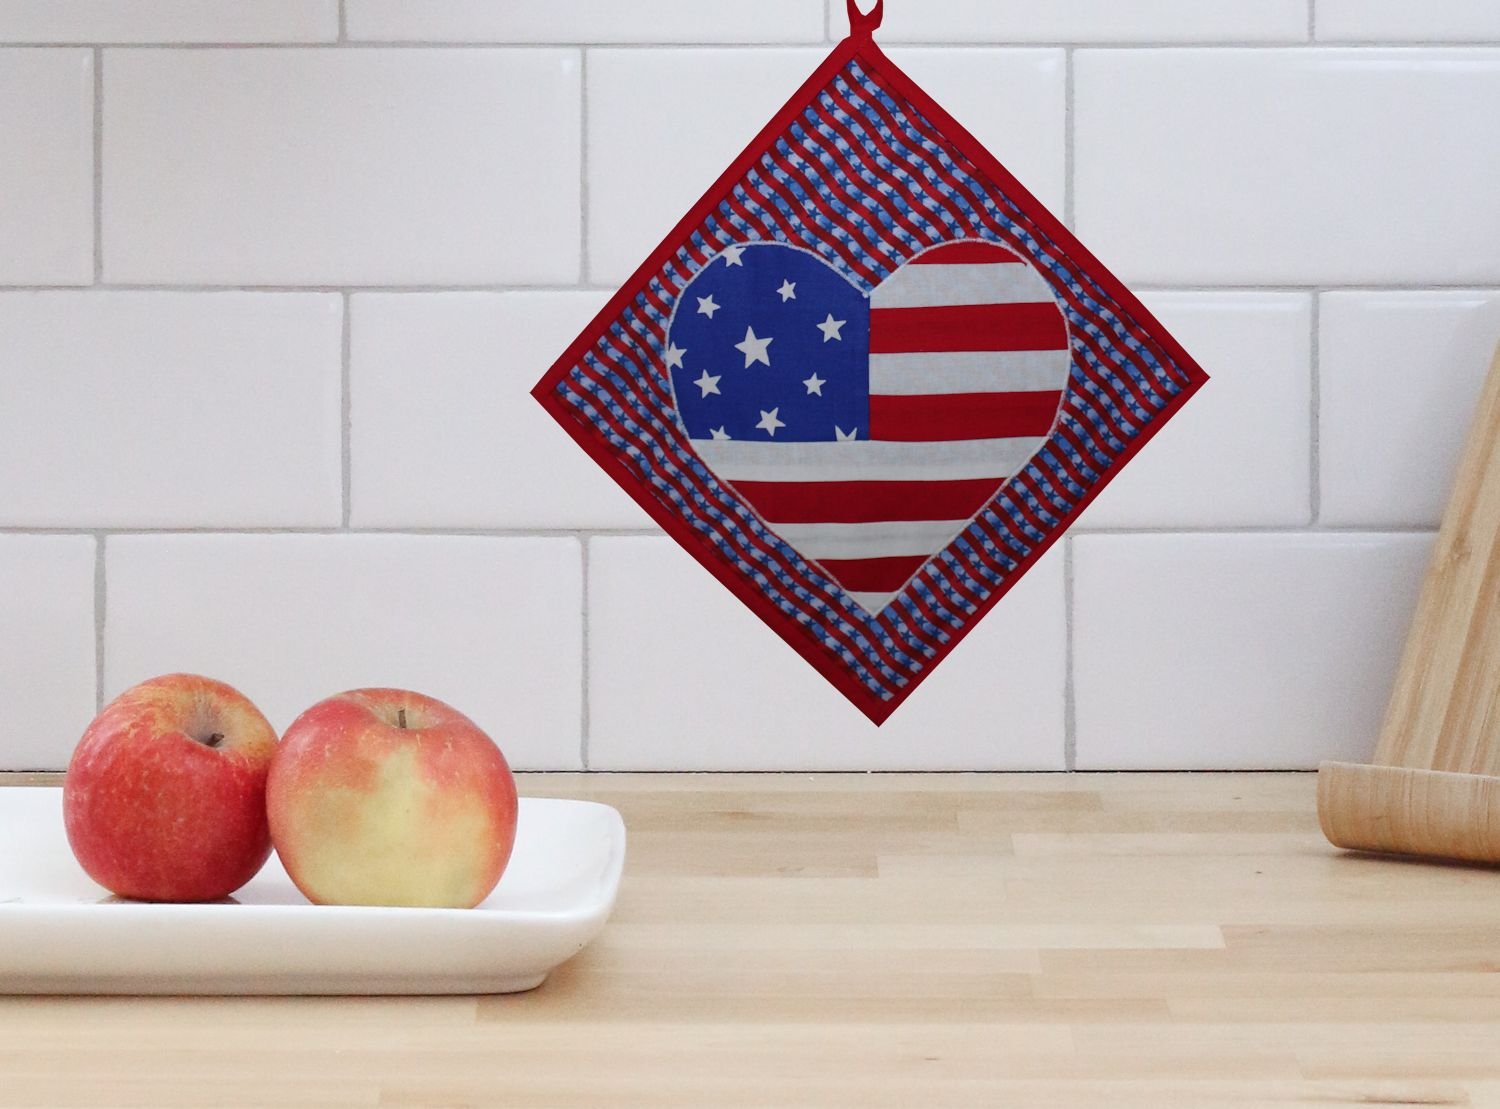




Table trivet - fast crochet with bulky yarn.