Refinish Hearth
Part 4 of Fireplace Makeover
update outdated hearth with chalk paint
Disclosure: This site contains affiliate links. As an Amazon Associate, I earn from qualifying purchases. Clicking on links, and purchasing products, may result in the seller paying us compensation. Affiliate links are in green.
Also see:
Lifestyle Blog
Fireplace Projects
Wood Projects
Paint Projects
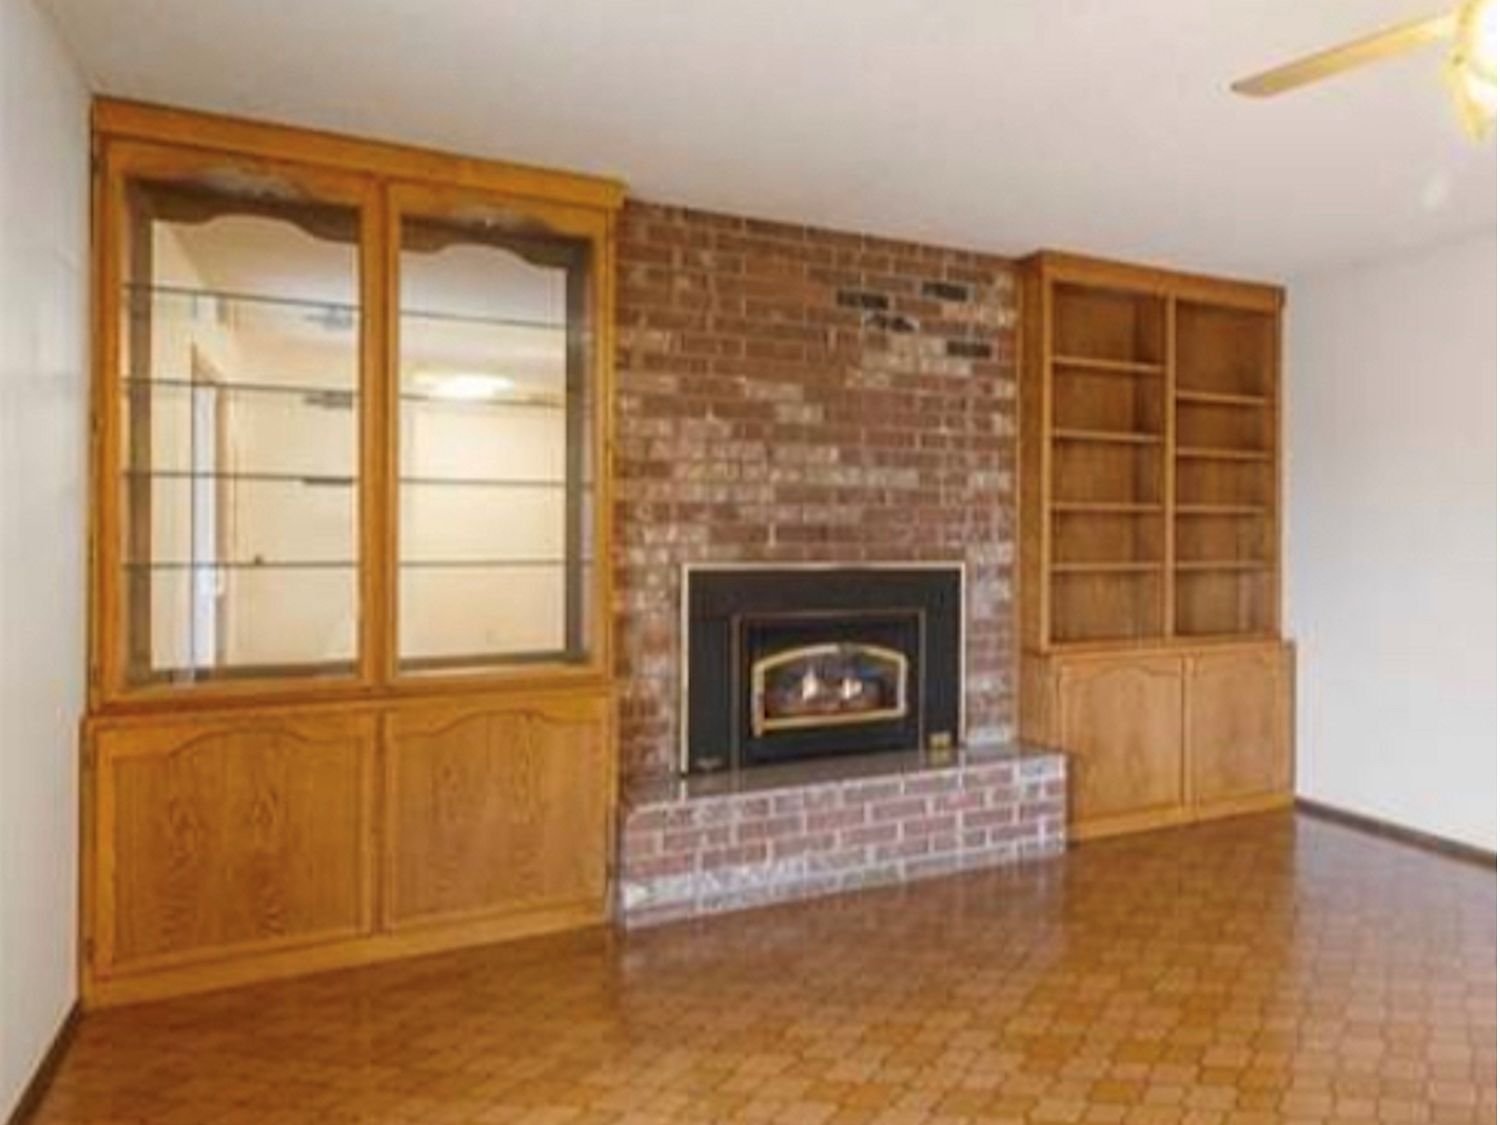
The original room is shown below. Vintage 1970’s. The hearth was actually a sparkly pinkish granite.
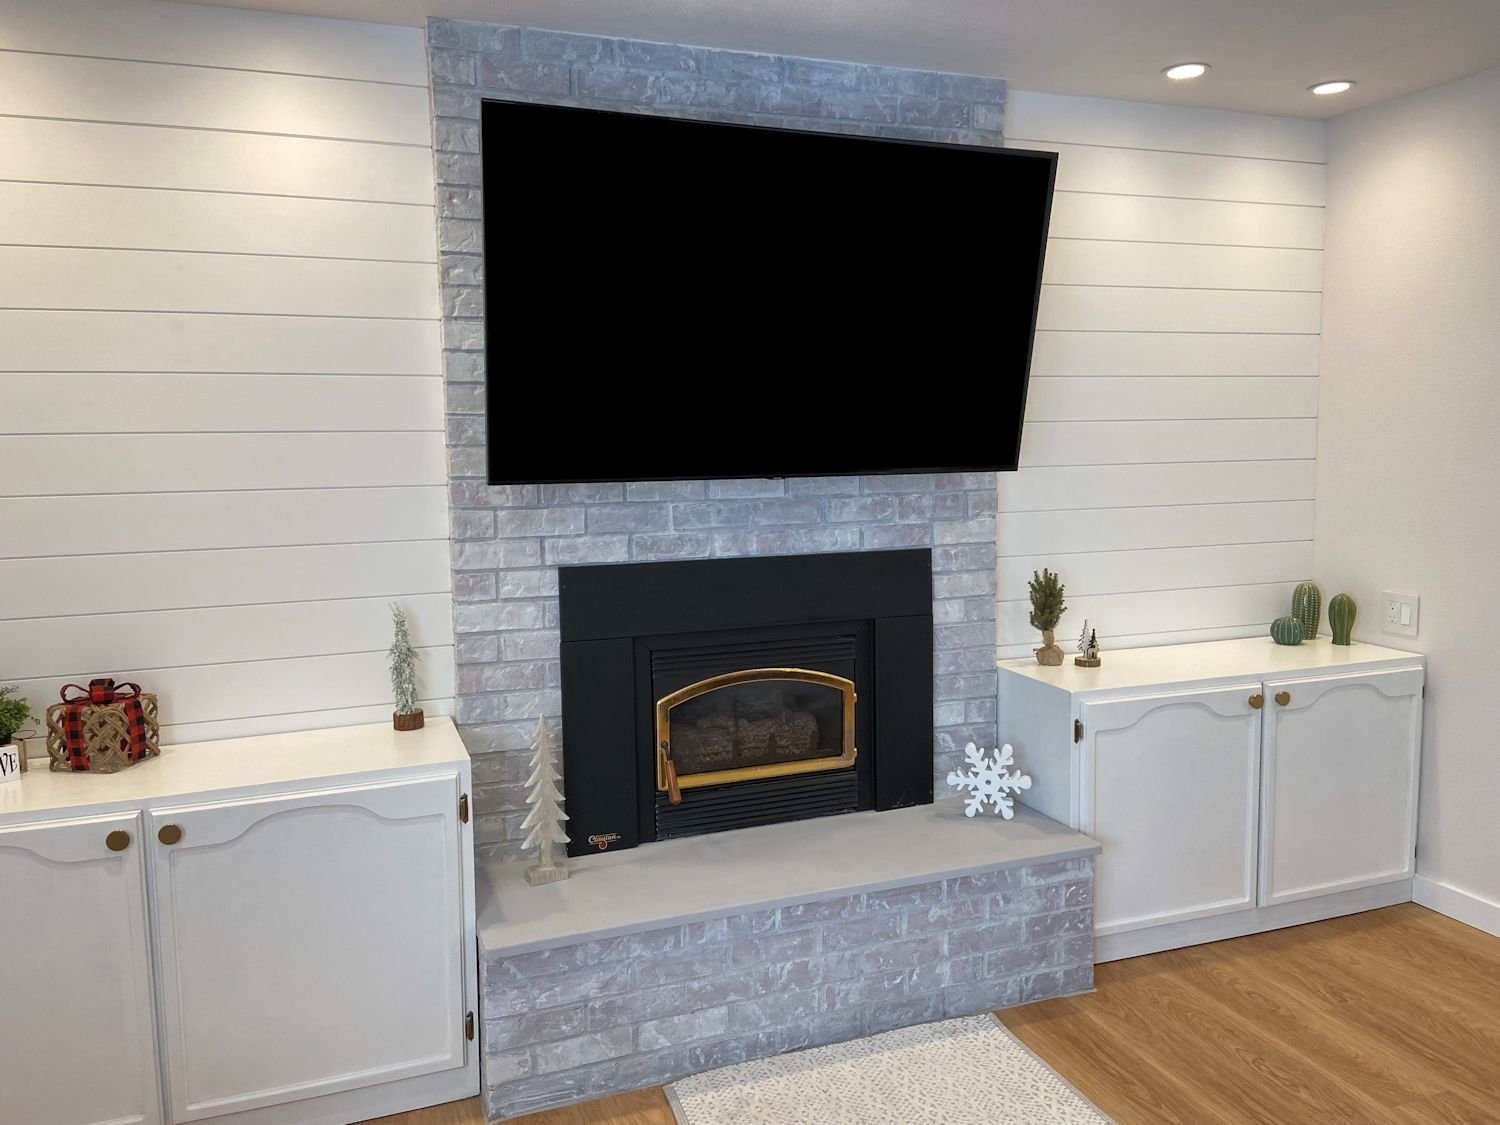
By this point, the shiplap was up, and the fireplace had been whitewashed. The pinkish, sparkly granite hearth had to go.
FIREPLACE PROJECT:
Part One: Whitewash The Fireplace
Part Four: Refinish Hearth
SUPPLIES for this project
Paint Choice: I used Annie Sloan Chicago Gray chalk paint
NOTE: This chalk paint is water based. It cleans up with water, and is very easy to apply. Follow directions on the can, or visit anniesloan.com. We are not affiliated with that company in any way - I simply chose that product based on reviews from friends.
Sealer: Artisan Enhancements™ Professional Acrylic Varnish
General Paint Supplies
Click links to check Amazon prices. Green links are affiliate links.
painter's drop cloth (old towels will do – I use old towels to protect areas from paint splatter and drips
Various paint brushes in sizes of your choice
TSP or other good cleaner / degreaser
kitchen garbage bags with draw string for storing paint tray during breaks
baby wipes works well for quick clean-up
Resealable Plastic Bags (such as zip-lock) for storing brushes when not in use
Disposable Gloves definitely recommended when using the oil base paints
cloth for skin clea-up I used Disposable Cosmetic Pads
Rubber Mallet or hammer (for pounding down the paint can top when done painting)
Work in a well ventilated area
INSTRUCTIONS
Click photos to enlarge them.
Clean, Caulk, & Sand
Clean the hearth with a damp cloth (or TSP if the hearth need a good de-greasing; follow directions on the box). Let dry.
I had been told that sanding was not necessary. However, I later learned that with a shiny surface, sanding is recommended. Use 220 grain sandpaper to de-gloss the surface and smooth any rough areas.
Remove dust with a tack cloth.
Tape and Hang Covering
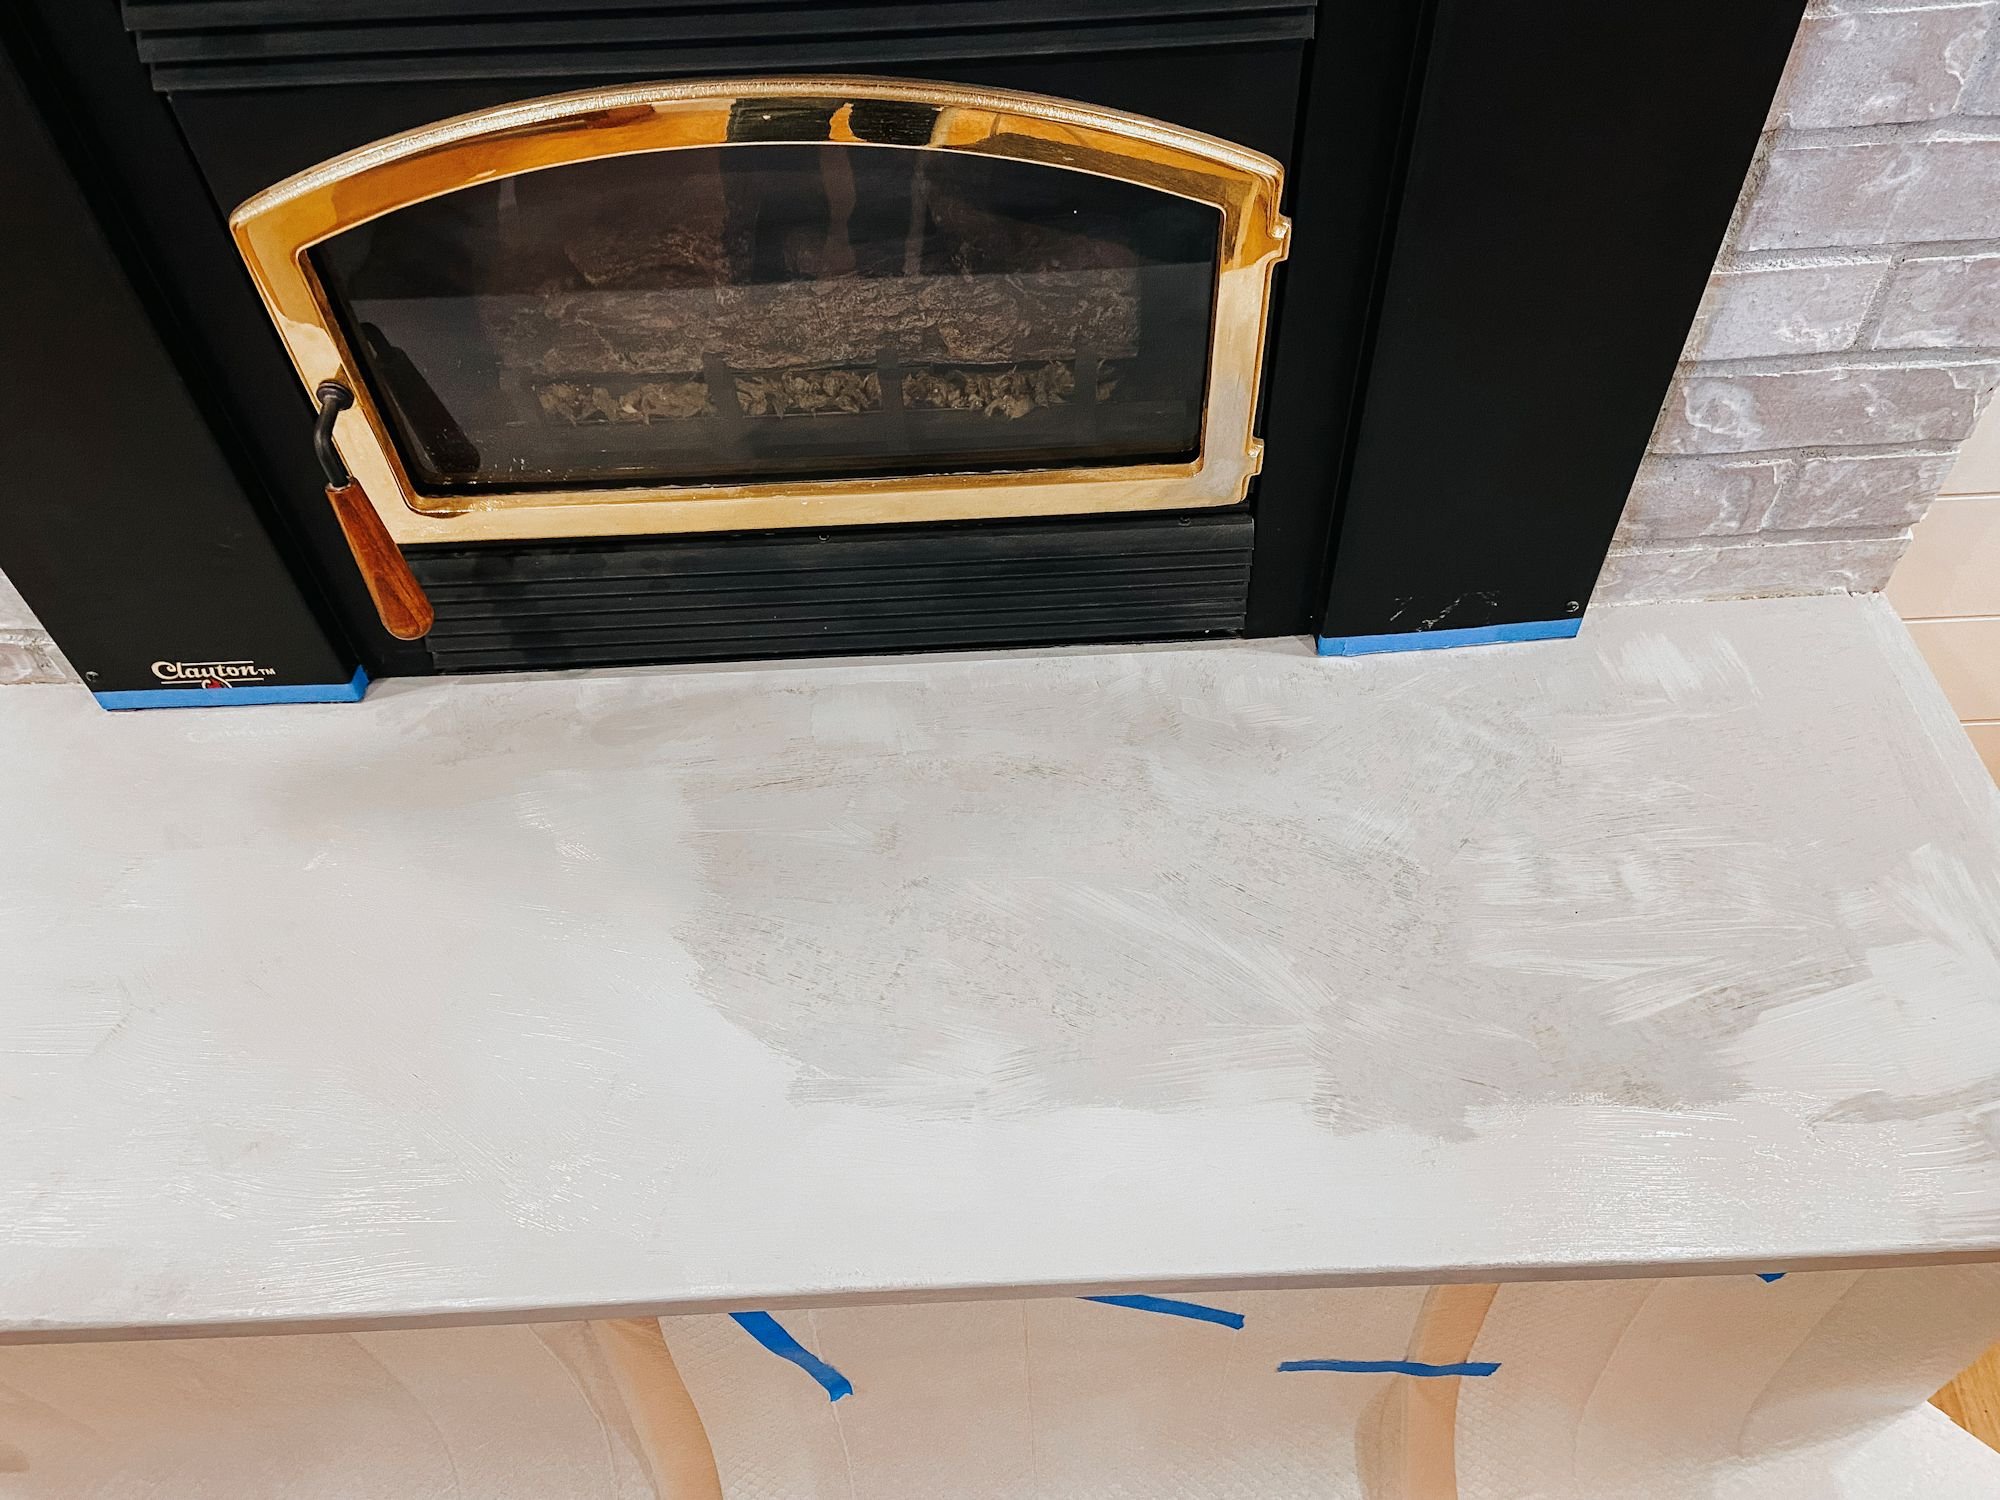
I taped off the lower edge of the fireplace insert to protect it from paint, and hung the covering around the base of the fireplace so that it partly covered the floor. I wanted the floor and fireplace to be protected from drips. The paint is very thick, so drips did not occur, but this is still a safe practice.
The light ends shown in the photos of the hearth are wood. The hearth itself was a pinkish, sparkly granite, trimmed on the ends with wood. I caulked the crease between wood and hearth, and used wood putty to fill in areas where the wood had chipped over the years. I wanted the end result to appear to be one piece for the hearth - without wood trim ends.
Apply First Coat
Without sanding, the paint went down fairly well, but it was very streaked after the first coat. Sanding may have allowed the paint to grip better.
It takes about 45 minutes to dry, at which time you can apply the second coat.
Apply More Coats As Needed
The second coat covered much better. See the photos below. The second photo shows the second coat partially on.
The above photo shows the start of the second coat.
Further Coats
The third coat covered everything perfectly. The following image shows the partially dried second coat. I ran the brush in many directions. Stroke marks show in the photo, but almost completely disappeared when the paint dried. The slight stroke marks remaining in places added to the nice appearance in my opinion. If you do not want any stroke marks, you can use a roller.
Protectant / Sealer
Many people use wax to finish chalk paint projects. Because this was for a fireplace hearth, the shop owner (where we bought the paint) recommended a water based sealant - matte finish. I did not want a shiny surface, so matte finish was appropriate.
I will wait to apply that until my husband is sure he no longer needs to drag the insert in and out - see below under “what I learned.”
The sealer I will use is Artisan Enhancements™ Professional Acrylic Varnish. It is clear, and cleans up with water. I am going with the shop owner’s recommendation.
What I learned
The paint dries in about 45 minutes. It cures in about 24 hours.
My husband had to pull the insert out a small distance to connect something after the painting was finished, dried, and cured. It scratched the surface - in one place clear down to the original surface. The protectant / sealer protects against scratches, but that had not yet been applied. I was able to slap on more paint to cover the area. Good as new. One of the benefits of painting things myself is that I have the paint for any needed touch-ups.
The paint is thick, but can be watered down. Their website says that it is sometimes better to apply many thin coats, rather than a few thick coats, for best adherence.
Plan on several coats.
Fresh New Look
I love the “new” hearth. The gray blends nicely with the shiplap and refinished cabinets.
To finish off my new hearth, I crocheted a beautiful basket. Quick & easy pattern!
More Projects
Lifestyle Blog
It’s all about enjoying life.












Protect your wood deck from the elements with proper prep and quality stain. Proper maintenance enhances the life span of a wood deck. Protect from snow, rain, freezing ice, hot sun.