Pillowcase Sewing Pattern
This pattern comes from our former site, CraftAndFabricLinks. Same owners - new site.
Disclosure: This site contains affiliate links. As an Amazon Associate, I earn from qualifying purchases. Clicking on links, and purchasing products, may result in the seller paying us compensation - at no extra cost to you. Affiliate links are in green.
Also see:
Lifestyle Blog
10 Easy Sewing Patterns
Organizing Tips & Projects
Quilt Lessons
Finished Pillowcase Sizes
Standard Case: 21" x 32"
Queen case: 21" x 36"
King Case: 21" x 42"
These will cover pillows nicely, with plenty of room. We are assuming the following pillow measurements:
Standard: 20" x 26"; Queen: 20" x 30"; King: 20" x 36"
Pillowcase Size vs Pillow Size
The finished pillowcase is 1" wider than the pillow. This gives a bit of room around the pillow, allowing for easier insertion of the pillow into the pillowcase.
For the length of the pillowcase, I add 10" to the length of the pillow. This allows for a nice, 3.5" hem.
If your pillows are not the size of those we listed above, simply do the following to create your pattern:
Width: measure the width of the pillow multiply by 2, then add 2.5"
Length: measure the length of the pillow and add 10"
Example: for a pillow that measures a bit wider, at 21" x 30", cut the pattern piece to be 44.5" x 40"
If you prefer a pattern piece that will be placed on the fold of the fabric, cut the pattern half as wide (22.25" x 40" for this example).
Our Etsy shop helps support this site, allowing us to continue to provide free content. Northwest and Scandinavian inspired original watercolor paintings. Tabletop and wall size - perfect for smaller spaces.
SUPPLIES REQUIRED
CUTTING TOOLS
I recommend using a Rotary Cutter, Cutting Mat and Sewing Ruler . I use these tools for most sewing projects. They allow for easy, precise cutting.
FABRIC
2 yards of 42.5" fabric (for 1 pair of Standard Cases)
2.25 yards of 42.5" fabric (for one pair of Queen Cases)
2.5 yards of 42.5" fabric (for 1 pair of King Cases)
BUY EXTRA & PREWASH FABRIC: You will need the full amounts, so buy a bit extra fabric. Wash and dry the fabric before use.
GENERAL SEWING SUPPLIES
Check Amazon for prices. Affiliate links are green. Qualifying purchases may help support our site.
rotary cutter and cutting mat makes cutting straight lines a snap
large clear sewing ruler I can't say enough about large rulers – I use them in my home remodeling and art projects as well
straight quilting pins (optional) quilting pins are larger than regular pins, so are easier to see
spring action fabric scissors regular and micro tip – I use both; the spring action is a huge assistance when doing a lot of cutting
thread most of my thread is on large serger cones – very economical
I always have a roll of butcher paper on hand for pattern making. It is economical and easy to use.
I always have a roll of butcher paper on hand for pattern making. It is economical and easy to use.
Thread (to match background)
Ribbon or lace, etc. for trim
Sewing Supplies: scissors, quilting pins, large sewing ruler, fabric marking pencils, seam ripper
hint: quilting pins are easier to use than regular pins; a tupperware box works well as a supply box.
Note: all seams are 1/4 inch. Always iron between steps.
Safety Reminders For Little Helpers
A. Always have an adult do all the ironing!
B. Never run with scissors. Carry them pointed end down.
C. Never use a sewing machine without adult supervision.
D. Always let an adult use the seam ripper for you.
Now you are ready to start!
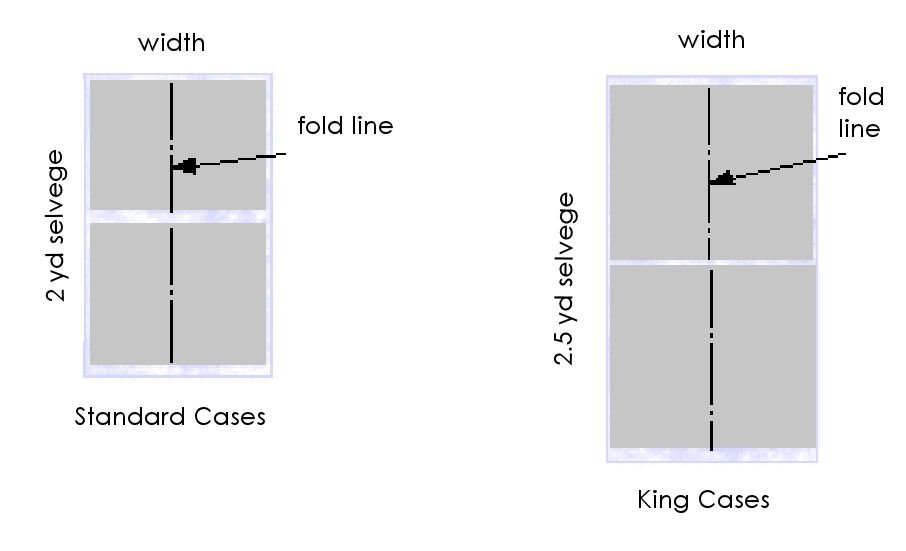
Please Note: These diagrams are not exactly to scale, but pattern pieces do fit as shown.
Pattern Pieces (updated 1/4/2016: width of fabrics corrected - thank you Lynn!)
First, create the pattern pieces. Cut to the dimensions below if you want to lay the pattern onto unfolded fabric.
Standard Case: Cut 2 pieces 42.5" x 36"
Queen Case: Cut 2 pieces 42.5" x 40".
King Case: Cut 2 pieces 42.5" x 46"
Cut to the dimensions below if you want to lay the pattern onto folded fabric.
Standard Case: Cut 2 pieces 21.25" x 36"
Queen Case: Cut 2 pieces 21.25" x 40".
King Case: Cut 2 pieces 21.25" x 46"
NOTE: If you do not have wide enough fabric to fold into a pillowcase, you can use two pieces of fabric. Each piece should be 21.25" wide.
INSTRUCTIONS
Click photos for larger image.
Cut Fabric
If laying pattern pieces onto flat fabric, use the layout on the left, below. "Fold Line" written on the pattern piece refers to the fold you will make when stitching the pillowcase together. If placing a pattern piece that is meant to be placed on the fold, fold your fabric lengthwise, then lay the pattern piece's long side along the fold of the fabric. I didn't use a pattern. I simply folded my fabric and measured 21.25" x 35". Note that it was not 36". I was 1" short. It was fine; it just meant that my hem would be 2.5" rather than 3.5".
Stitch Pillowcase Side & End
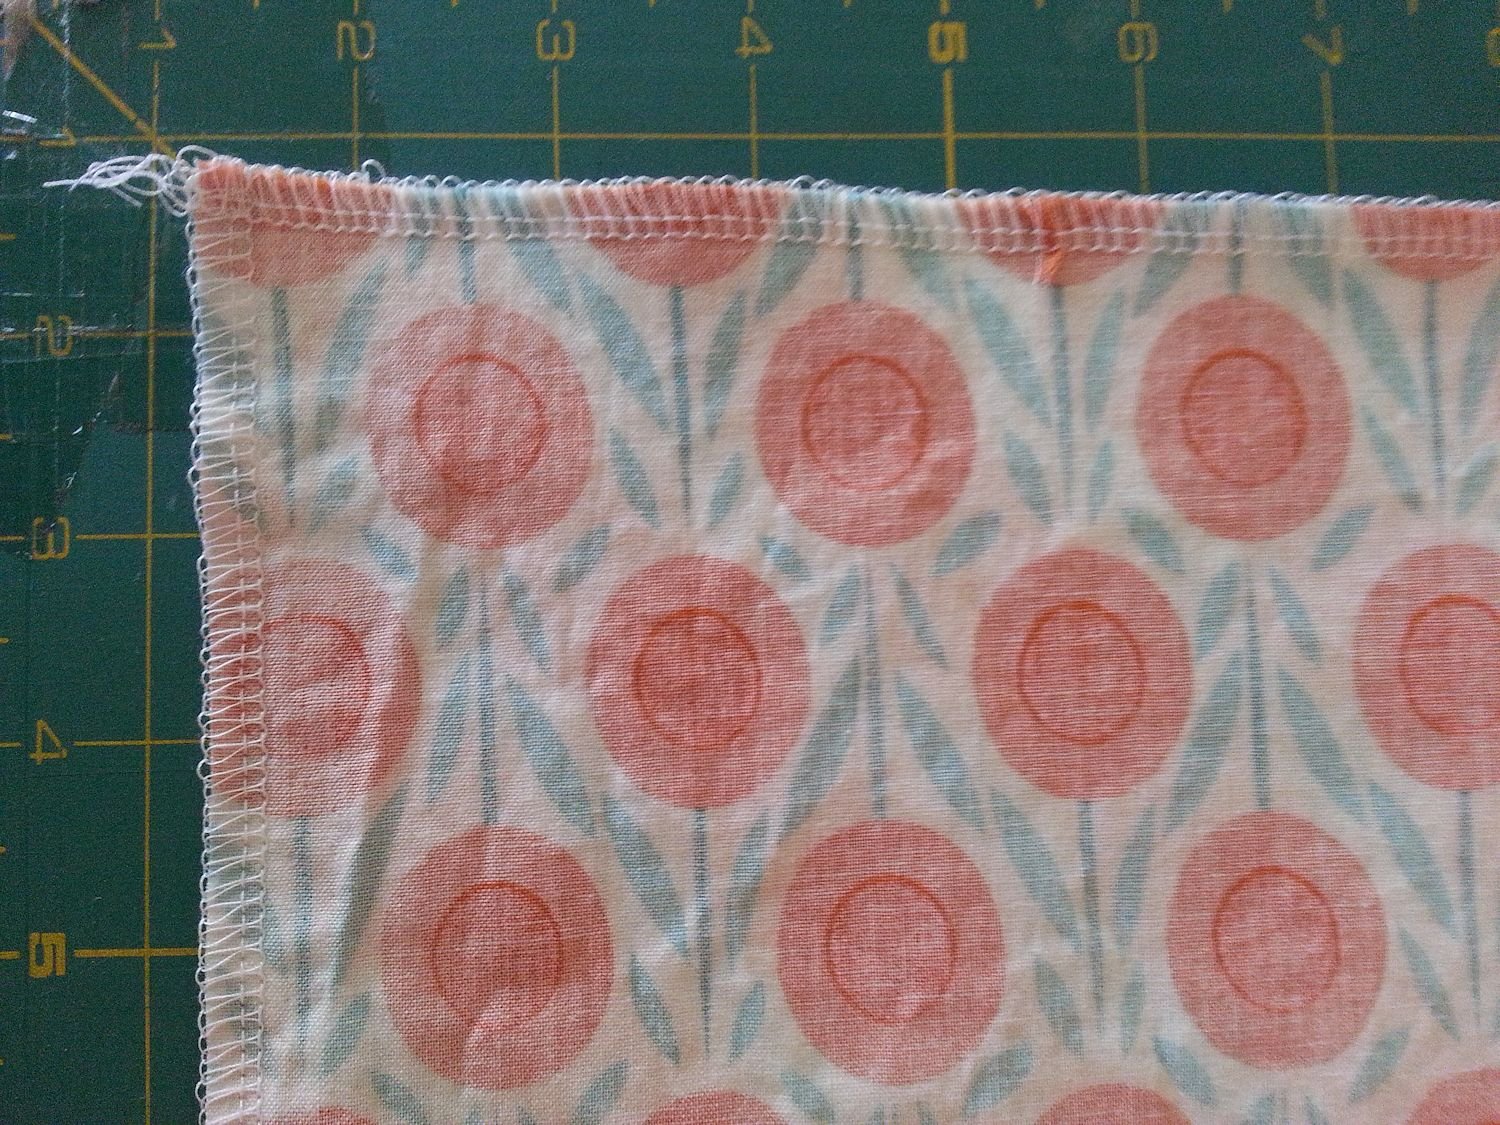
Stitch across the pinned short end and the pinned long side.
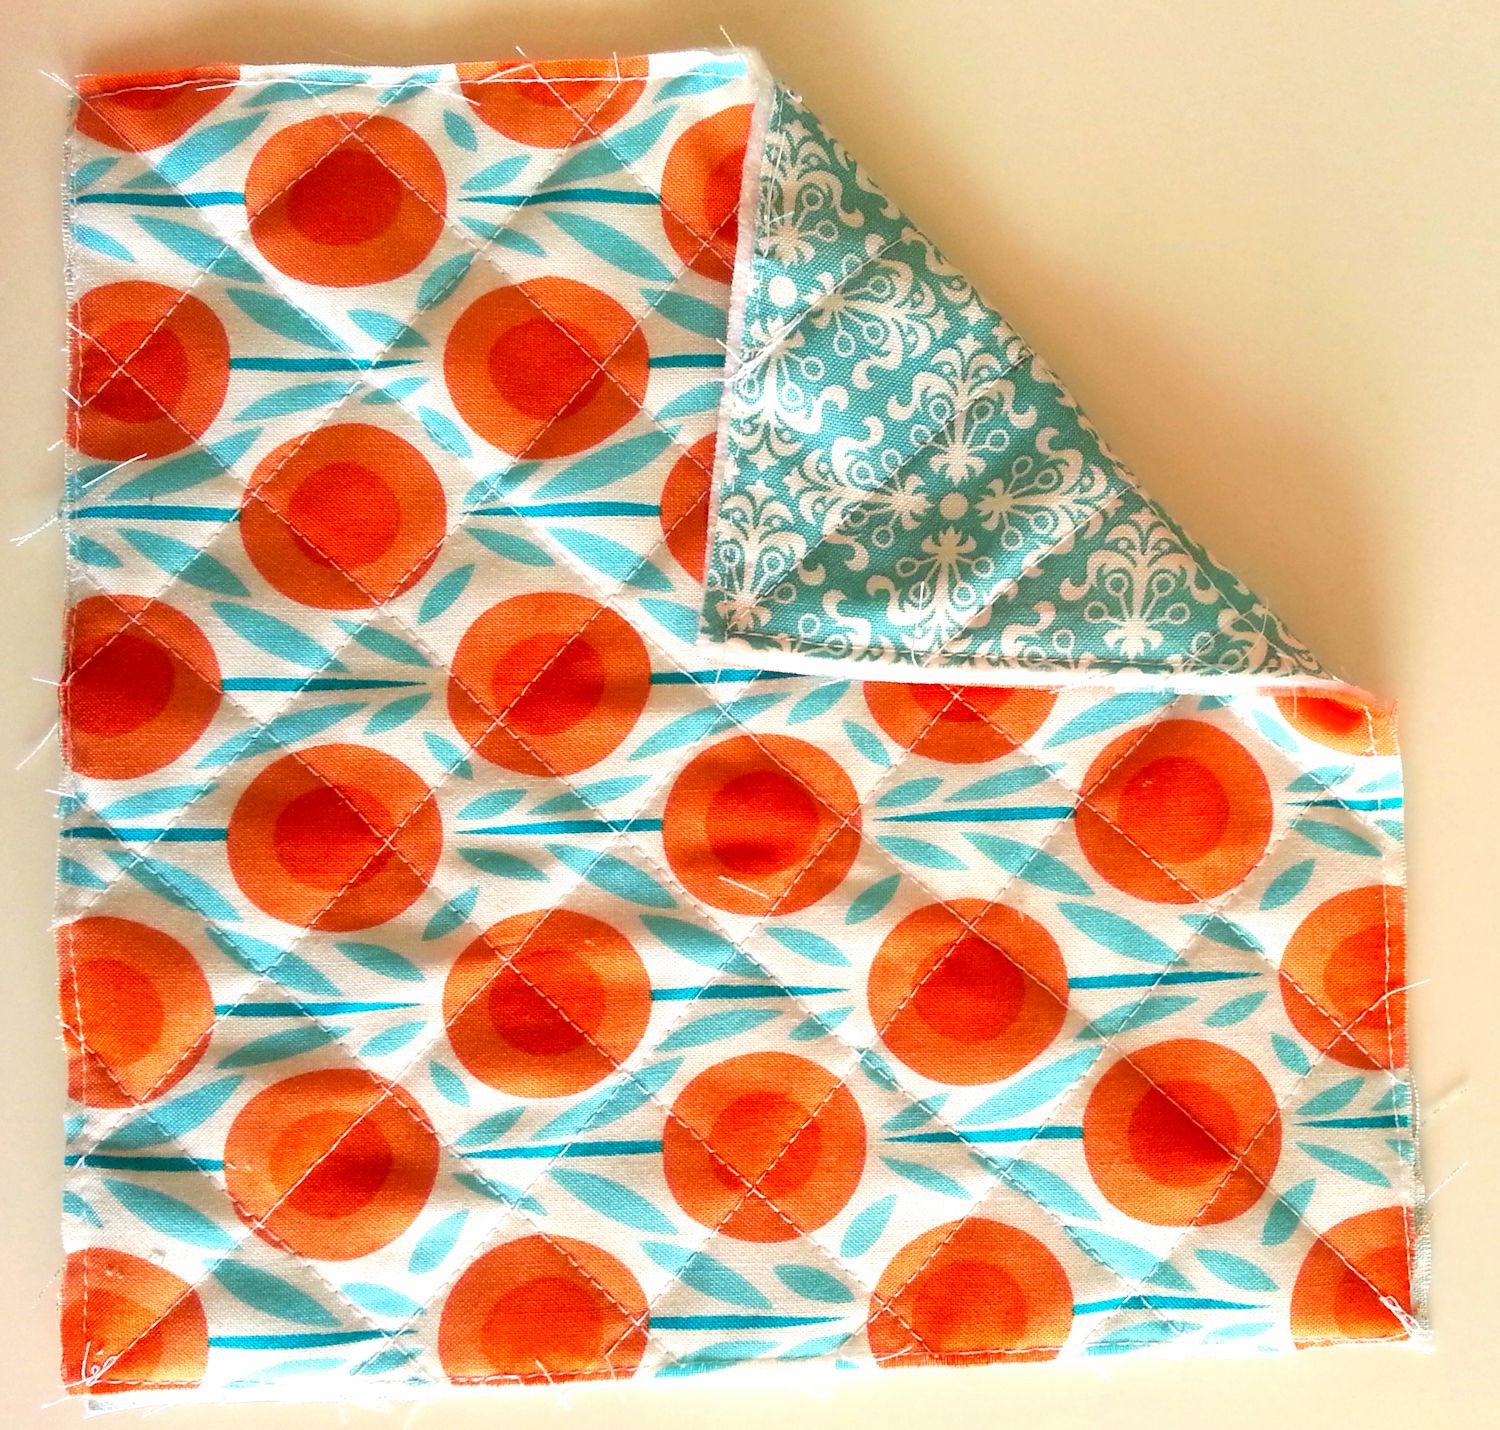
The photo on the right shows my pillowcase after stitching. I stitched across one open end, then down the long, open side.
I used my serger sewing machine.
Create Hem
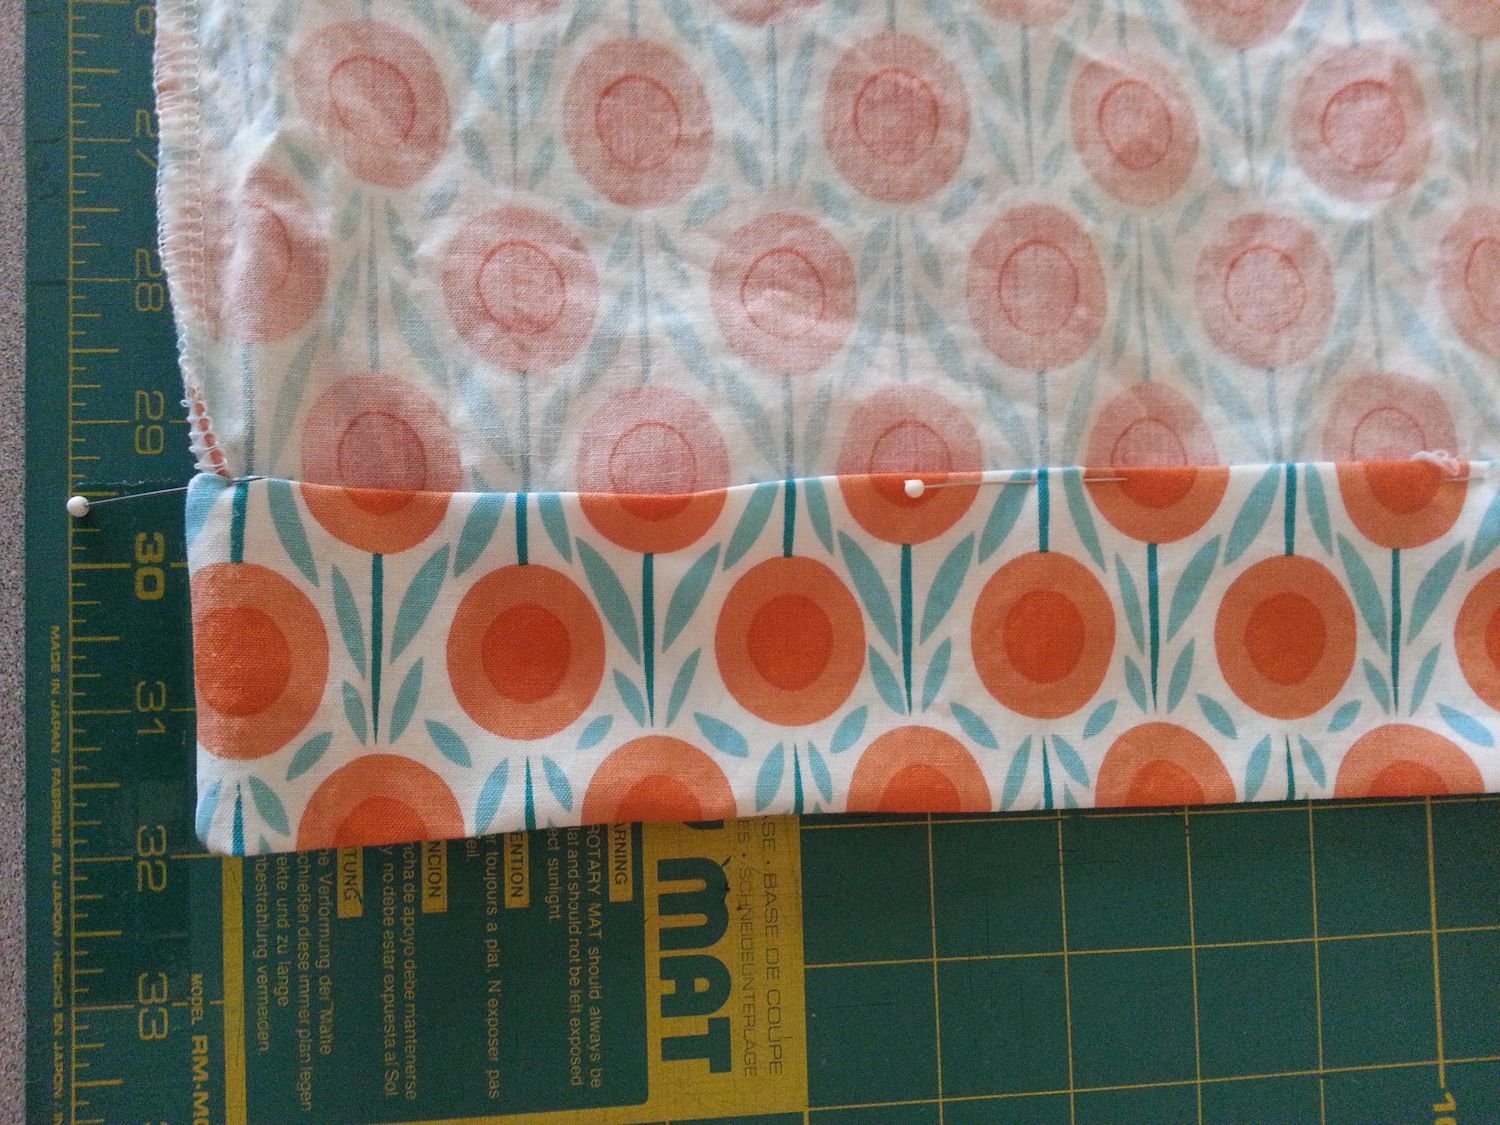
With pillowcase still wrong side out, turn the hem under 1/4". Press. Turn hem under 3.5". Use a ruler to make sure the hem is an even 3.5" all the way around.
Line up the hem side seam with the side seam of the pillowcase. This ensures that the hem lines up straight. After I was sure my hem was straight, and 3.5", I pressed and pinned it into place all the way around.
Stitch Hem
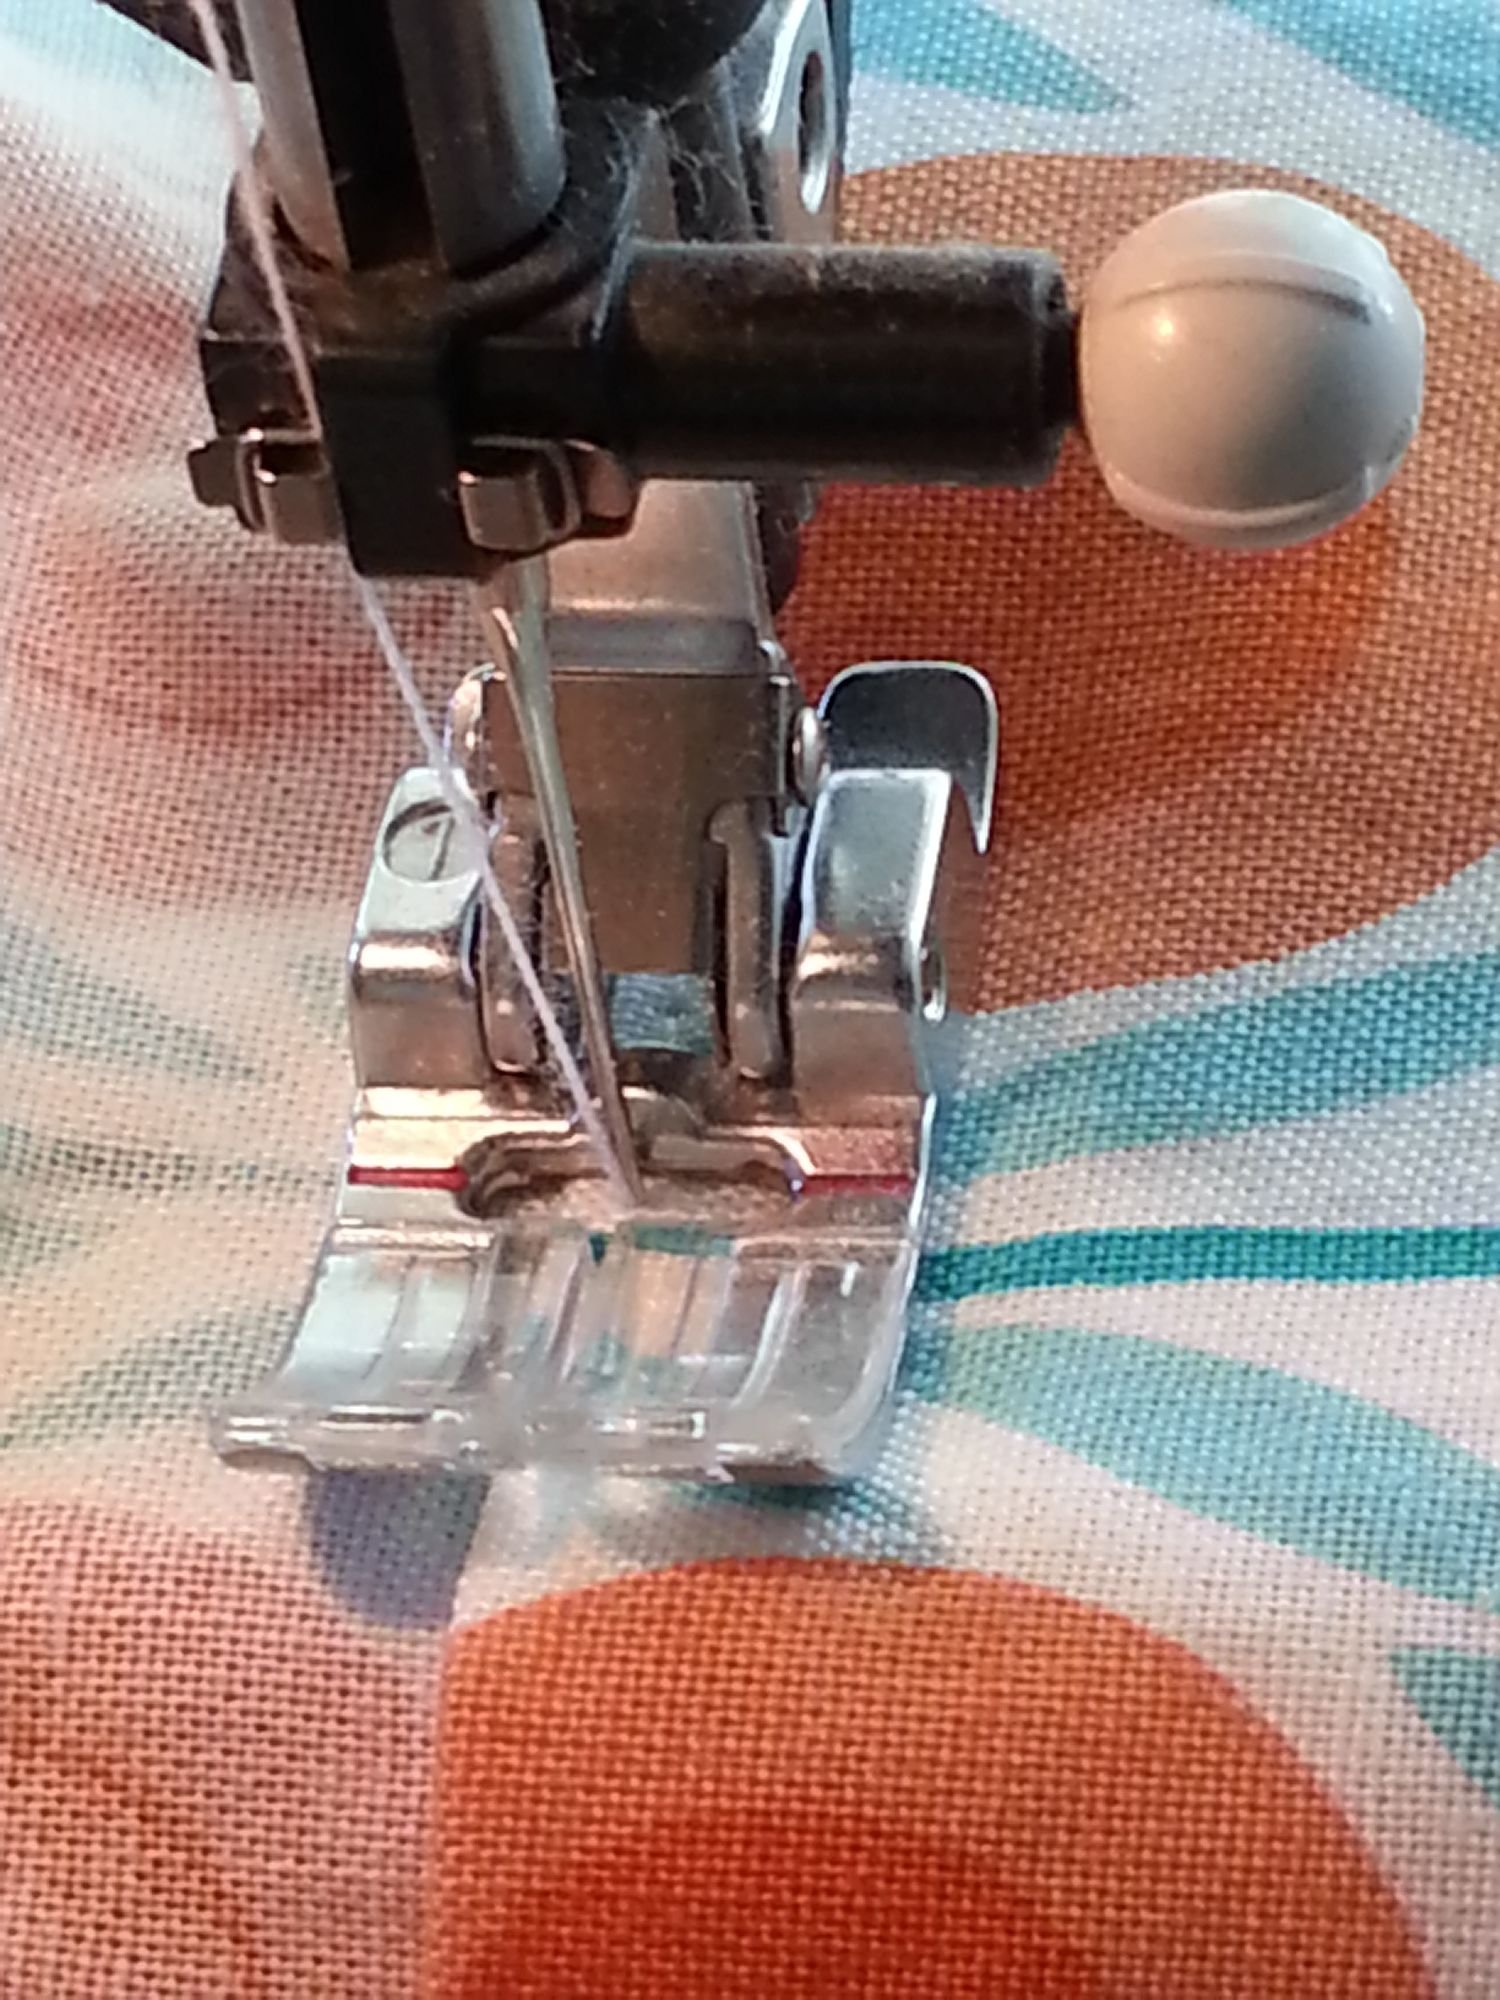
Stitch hem in place using a straight stitch (this is called top stitching). I stitch on the wrong side, close to the edge of the hem. This is best because if you stitch on the right side, you cannot see the edge of the hem. If you have a free arm machine, stitching will be easier. If you do not have a free arm, take care to not stitch through both layers of your pillowcase.
At this point, you can sew a satin ribbon or lace over the hem stitch line. Applique or embroidery adds a nice touch, as well..
Benefit Of Sewing - Good Quality!
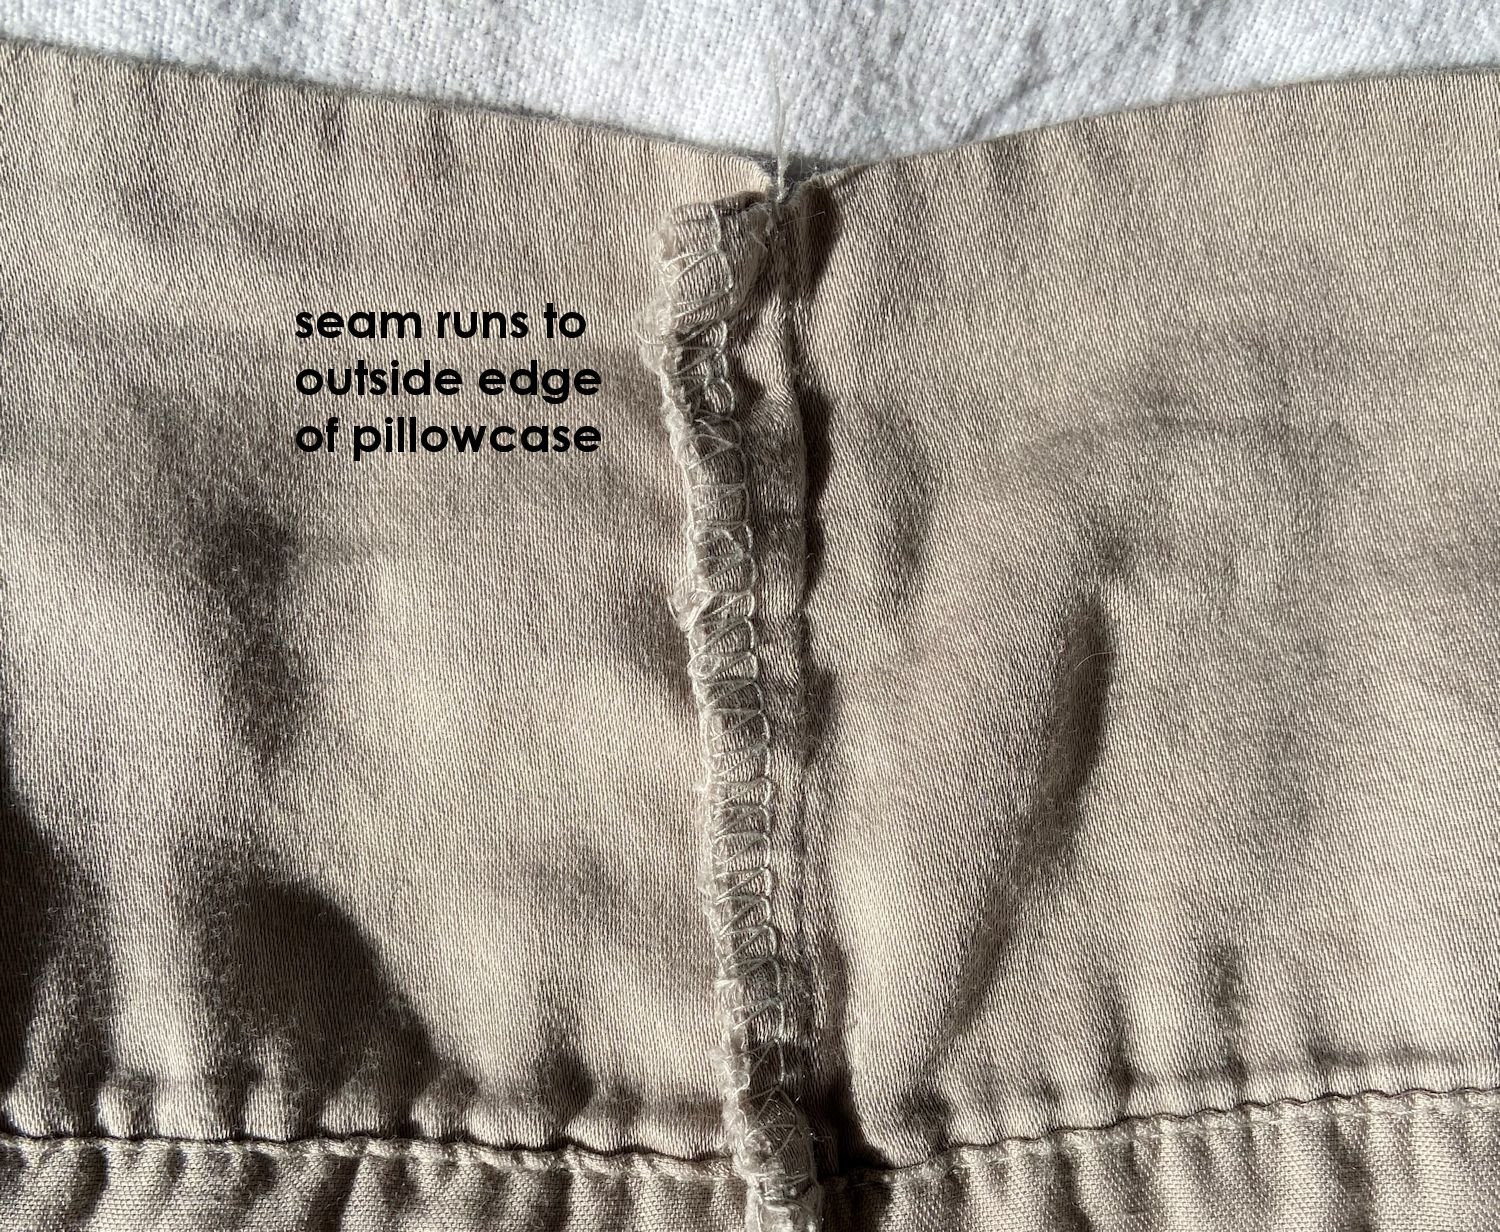
Improperly Constructed Pillowcase
If I take the time to sew, I want to end up with a product that is done correctly. A “quick and dirty” method of sewing is to lay out your pillowcase fabric piece, stitch the hem, and THEN stitch the sides. The problem with that is the side seams runs down through the hem area. The inside of the case is not finished inside the hem nicely.
I won’t say this is wrong. Companies cut corners where they can in order to keep costs down. It is very quick and easy to construct a pillowcase in such a way. I don’t like the unfinished side seam to come out to the edge of the pillowcase, however, so I take the (tiny bit of) extra time to do it “correctly.”
The case in the previous photo was NOT constructed properly. I find many improperly constructed pillowcases on the market today. They look alright at first glance, from the outside, but if you look inside the hem area you will see a seam allowance that runs all the way to the outer edge of the hem.
Good quality pillowcases are constructed properly, but they are much more expensive.
I saw some pillowcases for sale the other day, and they were $24-$35 and more PER PAIR. I could not see how they were constructed. For that price, I would expect them to be constructed properly. I decided to purchase one flat sheet as fabric, and construct my own pillowcases. I could get many more than just 2 for that money! AND they would be sewn well.
Once you know the proper method of construction, you notice pillowcases more. Check out pillowcases you have purchased. Are they constructed properly?
It’s all about enjoying life in a perfect balance.
Organize, minimize, simplify, DIY. Free up time and money for hiking, biking, art, enjoying nature - or doing the things you love.
All of us at Spruce And Fjell DIY and minimize wherever possible. This site is all about teaching you how you can do things for yourself, whether home improvement, sewing, or crafting. Spend that money instead on getting the most out of life. For us, it is enjoying nature and making our homes cozy. That is the legacy our Nordic grandparents passed on to us.
Follow our blog to see some gorgeous scenery, and learn our tips on keeping hygge (coziness) in your home, and living the lagom lifestyle (perfect balance: not too much, not too little).
Sewing Lessons
Protect your lap from hot or cold dishes. Soft yarn and perfect size. Can also use for blankets or scarves.
Learn how to add detail with free motion embroidery using a regular sewing machine and darning foot.
Learn how to turn a simple tee shirt pattern into a robe with buttons and pockets - or a dress! One pattern - many uses.
Learn how to use an applique pressing sheet to create intricate applique. Free pattern provided.
Choose the correct sewing machine for your needs. Learn about features and functions. Free checklist to download.
Learn to crazy quilt! Hot pad, quilt block, or decorative pillow block. Fun way to use fabric scraps.
Learn how to attach elastic. Properly attached elastic will create a nice fit around a leg opening of a gymnastic suit or swimsuit.
Sewing lesson: learn how to work with nap, fabric direction, and plaid prints. Align plaids so they match up correctly.
Learn reverse applique. Quilt, hot pad or pillow. The top layer is cut away to reveal an underlying layer. Create a beautiful, layered valentine.
Learn two methods for sewing mitered corners for cushion covers, tote bags, mattress covers.
Applique lesson and pattern. Learn how to use fusible web. Create a spring wall hanging.
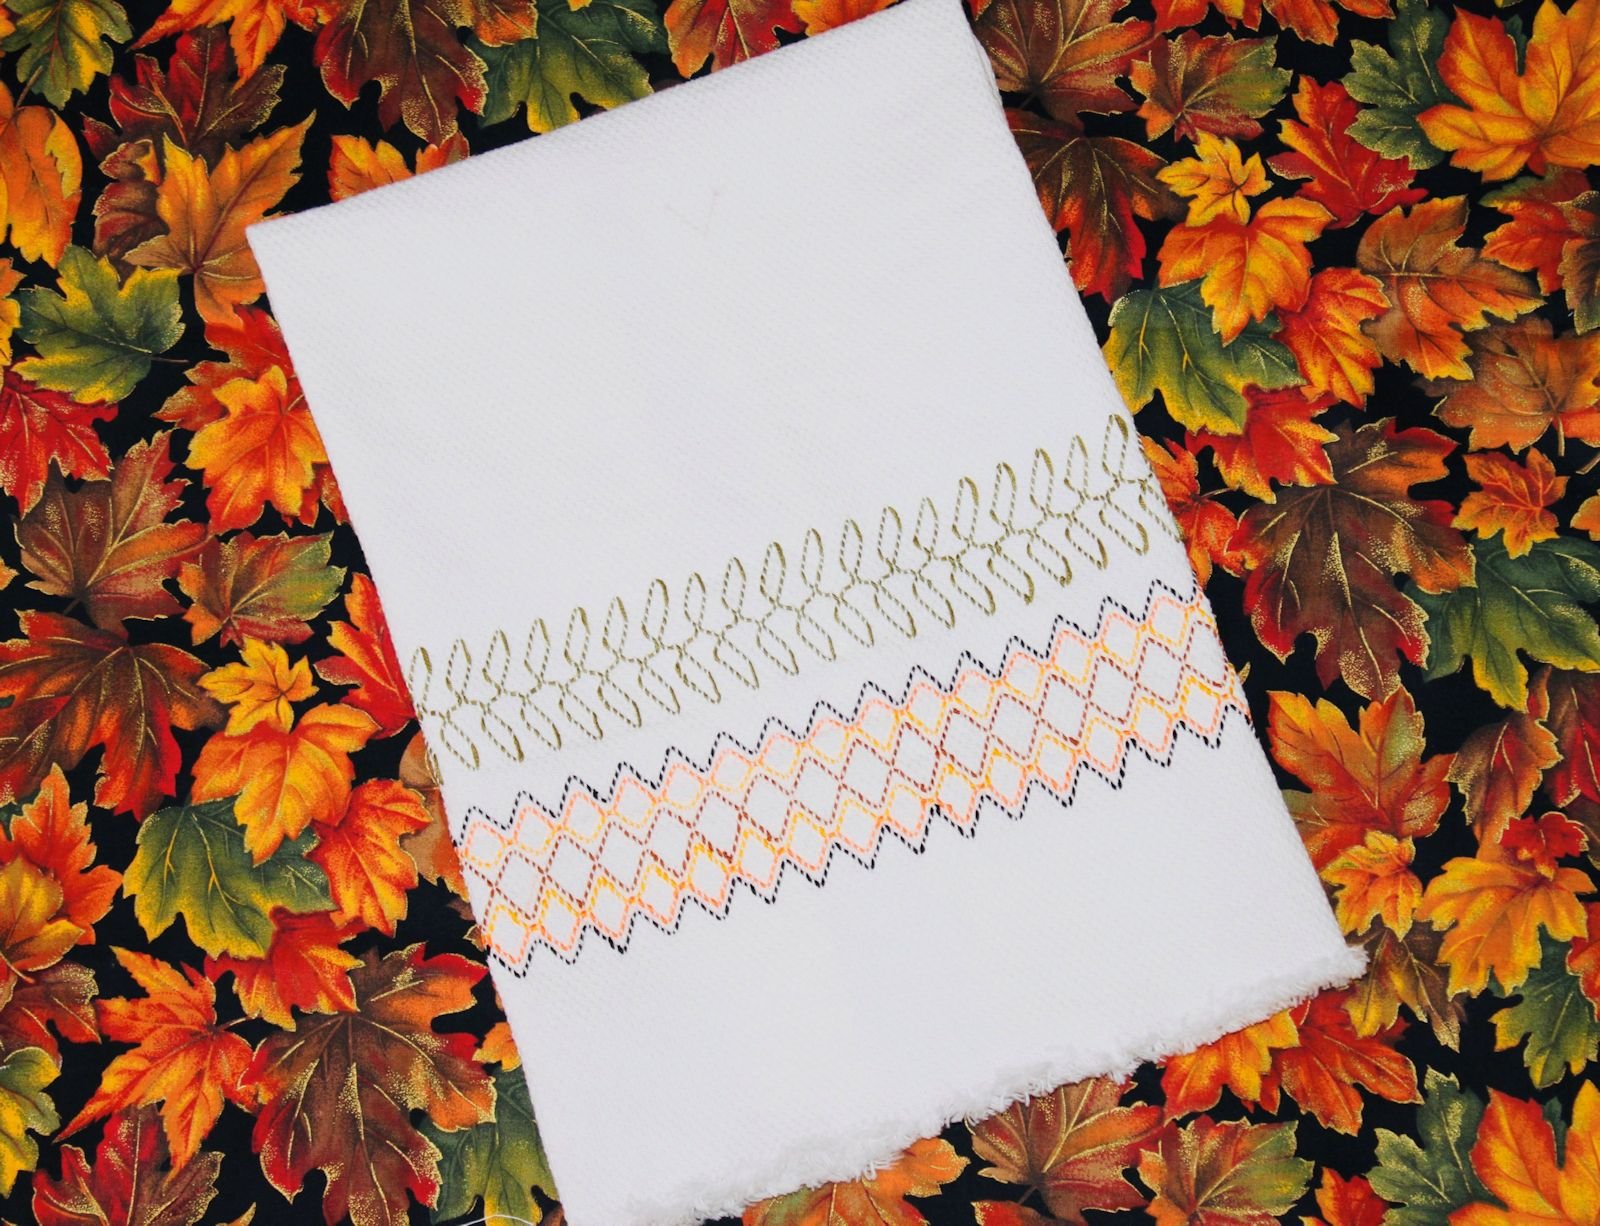
Learn the art of huck weaving - also known as Swedish weaving. Use inexpensive huck toweling to create beautifully decorated items.
Lesson 4. Learn how to sew a cuff and properly attach it to a pant leg. Free instructions for pajama pants.
Lesson 2. Learn the correct method for tracing an existing pair of pants to create a new sewing pattern. .
Lesson 1: Create Custom Pattern. Total of 4 lessons including making and altering a pattern, add elastic or drawstring waistband, sewing the PJ pants.
Pillows and Quilts
Nicely constructed pillowcase with contrast cuff and piping trim. Cuff is nicely finished on the inside. Free sewing pattern with directions for standard, queen and king.
Inner cushion and removable cover made with non-slip fabric. Super easy - no buttons or zippers. Protect furniture from pet fur, add comfort to hard surface chairs.
Adorable doll quilt or quilt block. Prairie girl enjoying her garden along with her dog.
Learn the Ohio Star quilt block while making this Independence Day placemat with watermelon applique. Included: instructions for solid center block.
Envelope back square pillow. Optional letters are padded with fusible fleece. Easy - no zippers or buttons. Side ties.
Three different Halloween scenes to applique. Use for pillows, hot pad, quilt blocks, wall hanging. So many uses!
Two patterns! Country Girl and Dinosaur applique. For tote, pillow, quilt block, wall hanging. Adorable for baby’s room.
Learn to crazy quilt! Hot pad, quilt block, or decorative pillow block. Fun way to use fabric scraps.
Learn seminole piecing while making this beautiful case. Includes inside pocket for holding glasses.
Adorable 4-inch mini quilt patterns for use as coasters or doll bed. Ohio Star and center diamond.
Looks complicated, but it is actually quite easy with strip quilting technique. Requires sewing points. Pillow, quilt block, or wall hanging for Valentine’s Day.
Learn two methods for sewing mitered corners for cushion covers, tote bags, mattress covers.
Easy cushion cover pattern for any square or rectangular cushion, futon, or mattress. Customize the fit. Wheelchair or pet cushion, baby or doll bed mattress.
Applique lesson and pattern. Learn how to use fusible web. Create a spring wall hanging.
2 patterns! Pieced hot pad, and appliqued trivet. Use for quilt, hot pad, trivet, pillows.
Super easy! The case is finished on both ends - keeps the pillow securely inside. Perfect for small pet bed.
Home Improvement
Protect your wood deck from the elements with proper prep and quality stain. Proper maintenance enhances the life span of a wood deck. Protect from snow, rain, freezing ice, hot sun.
Create an opening in a deck fence and add an easy-to-install step. Improve access and view of your yard beyond your deck.
Install a secure fencepost that will withstand ground moisture. Strongly secured with concrete footing.
Rejuvenate your rusty old chain link fence by adding fresh paint. Learn the tricks to creating a beautiful like-new fence.
Protect your blueberries from birds with a DIY cover. Easy to create using netting and PVC frame.
Keep garden maintenance down by using a weed barrier. Spend time up front to save time over the long run.
DIY personalized house address sign. Free mountain pattern provided. Quick and easy project to dress up your home.
Build a beautiful ramp with decking top for your garden shed. Step by step instructions.
Easy, portable DIY firepit made from reclaimed landscape bricks. Create memories with family and friends.
By choosing the right tools, you can do your own mowing and edging. Proper weight and size is the key. DIY yard maintenance tools.
Turn a boring wall into a beautiful, functional space. Calculate spacing. Wall molding, trim & coat hooks.
Spruce up your closet laundry. Paint, better lighting, and new shelves help mood and organization.
Transform an accent wall by installing shiplap. Very easy with our step-by-step directions. Part 3 of our fireplace makeover.
Refinish an out of date fireplace hearth with chalk paint. Part 4 of our fireplace makeover.
Refinish cabinets to lighten and brighten a room. Part 2 of our fireplace makeover series.
Exterior stucco fireplace makeover. Learn how to repair or replace loose tiles, fill cracks, and re-paint.
Building plans for elevated wood flower boxes. Save your back and add beauty to your yard.
Transform your fireplace by whitewashing the old brick. Easy, with beautiful results. You can do this!
Repair and paint an old shed to breathe new life into it. Quick and easy landscape upgrade.
Learn how to remove carpet, linoleum, and subfloor. Do it yourself to save money - plus it will be done to your satisfaction, and you can ensure all the mess is properly cleaned up.
Instructions and safety tips on how to remove a sparkly ceiling. Add new texture and paint. With the right tools and motivation, you can do it!




















Learn Intarsia and Tapestry crochet. Bring Hygge into your home with this cozy, Scandinavian minimalist Christmas tree design. For blankets, pillows, hot pads.